


Introduction
Software development teams strive to deliver high-quality code that is free from bugs, vulnerabilities, and performance issues. 💪 To ensure code quality, it's essential to incorporate a reliable code analysis tool into the development process. SonarQube, coupled with AWS CodePipeline, provides a powerful solution for continuous code quality assessment and improvement. 🎯
Table of contents
Introduction to SonarQube and AWS CodePipeline 📚
Setting up SonarQube in AWS 🔧
Configuring AWS CodePipeline for SonarQube integration 🔗
Run the CodePipeline 🚀
Conclusion 🎉
Introduction to SonarQube and AWS CodePipeline 📚
SonarQube is an open-source platform that performs static code analysis to detect bugs, security vulnerabilities, code smells, and other code quality issues. It offers a comprehensive set of rules and metrics to evaluate the health of your codebase. There is also a paid version with additional features available.
AWS CodePipeline, on the other hand, is a fully managed continuous integration and continuous delivery (CI/CD) service provided by AWS. It helps automate the software release process by building, testing, and deploying applications.
Setting up SonarQube in AWS 🔧
Before integrating SonarQube with AWS CodePipeline, you need to set up SonarQube in your AWS environment. You can follow my guide on how to setup SonarQube on AWS ECS:
 Alexander Hose
Configuring AWS CodePipeline for SonarQube integration 🔗
CodeCommit
First, we need to take an existing CodeCommit repository or create a new one. In the root of the repository, we will create a buildspec.yml file. This file helps automate the build process by specifying the steps needed to build, test, and package your application or codebase. By version controlling the buildspec.yml file alongside your source code, you ensure reproducibility and consistency in your builds. In our case, we will use the file to trigger the analysis of the source code. The setup for the file will look like this:
version: 0.2

phases:
    install:
        commands:
            - pip3 install -q awscli --upgrade --user
            - pip3 install boto3
            - yum -q install -y jq
            - wget -qO /tmp/sonar-scanner.zip "https://binaries.sonarsource.com/Distribution/sonar-scanner-cli/sonar-scanner-cli-4.7.0.2747-linux.zip"
            - unzip -q /tmp/sonar-scanner.zip -d /tmp
    pre_build:
        commands:
            - echo Start code scan...
            - ./../../../../../../../tmp/sonar-scanner-4.7.0.2747-linux/bin/sonar-scanner -Dsonar.projectKey=$SONAR_QUBE_PROJECT -Dsonar.sources=. -Dsonar.host.url=$SONAR_QUBE_URL -Dsonar.login=$SONAR_QUBE_KEY
            - sleep 7
            - "curl -s -u $SONAR_QUBE_KEY: $SONAR_QUBE_URL/api/qualitygates/project_status?projectKey=$SONAR_QUBE_PROJECT> /tmp/result.json"
            - if [ $(jq -r '.projectStatus.status' /tmp/result.json) = ERROR ] ; then CODEBUILD_BUILD_SUCCEEDING=0 ; fi
            - echo Code scan completed on `date`
            - if [ "$CODEBUILD_BUILD_SUCCEEDING" -eq 0 ]; then exit 1; fi
We can of course extend the file with further instructions on building the actual software or performing tests. Let's have a more detailed look at the instructions now. First, we install sonar scanner cli and trigger the scan. The referenced environment variables will be set later.
- echo Start code scan...
- ./../../../../../../../tmp/sonar-scanner-4.7.0.2747-linux/bin/sonar-scanner -Dsonar.projectKey=$SONAR_QUBE_PROJECT -Dsonar.sources=. -Dsonar.host.url=$SONAR_QUBE_URL -Dsonar.login=$SONAR_QUBE_KEY
Afterward, we wait for a few seconds and get the results from the API. If we get an error in the project status, we will directly cancel the execution of the pipeline.
- sleep 7
- "curl -s -u $SONAR_QUBE_KEY: $SONAR_QUBE_URL/api/qualitygates/project_status?projectKey=$SONAR_QUBE_PROJECT> /tmp/result.json"
- if [ $(jq -r '.projectStatus.status' /tmp/result.json) = ERROR ] ; then CODEBUILD_BUILD_SUCCEEDING=0 ; fi
- echo Code scan completed on `date`
- if [ "$CODEBUILD_BUILD_SUCCEEDING" -eq 0 ]; then exit 1; fi
The results from the quality gates project status endpoint will look like this:
{
   "projectStatus":{
      "status":"OK",
      "conditions":[
         {
            "status":"OK",
            "metricKey":"new_reliability_rating",
            "comparator":"GT",
            "errorThreshold":"1",
            "actualValue":"1"
         },
         {
            "status":"OK",
            "metricKey":"new_security_rating",
            "comparator":"GT",
            "errorThreshold":"1",
            "actualValue":"1"
         },
         {
            "status":"OK",
            "metricKey":"new_maintainability_rating",
            "comparator":"GT",
            "errorThreshold":"1",
            "actualValue":"1"
         }
      ],
      "ignoredConditions":false,
      "period":{
         "mode":"PREVIOUS_VERSION",
         "date":"2023-06-11T16:17:19+0000"
      },
      "caycStatus":"compliant"
   }
}
CodeBuild
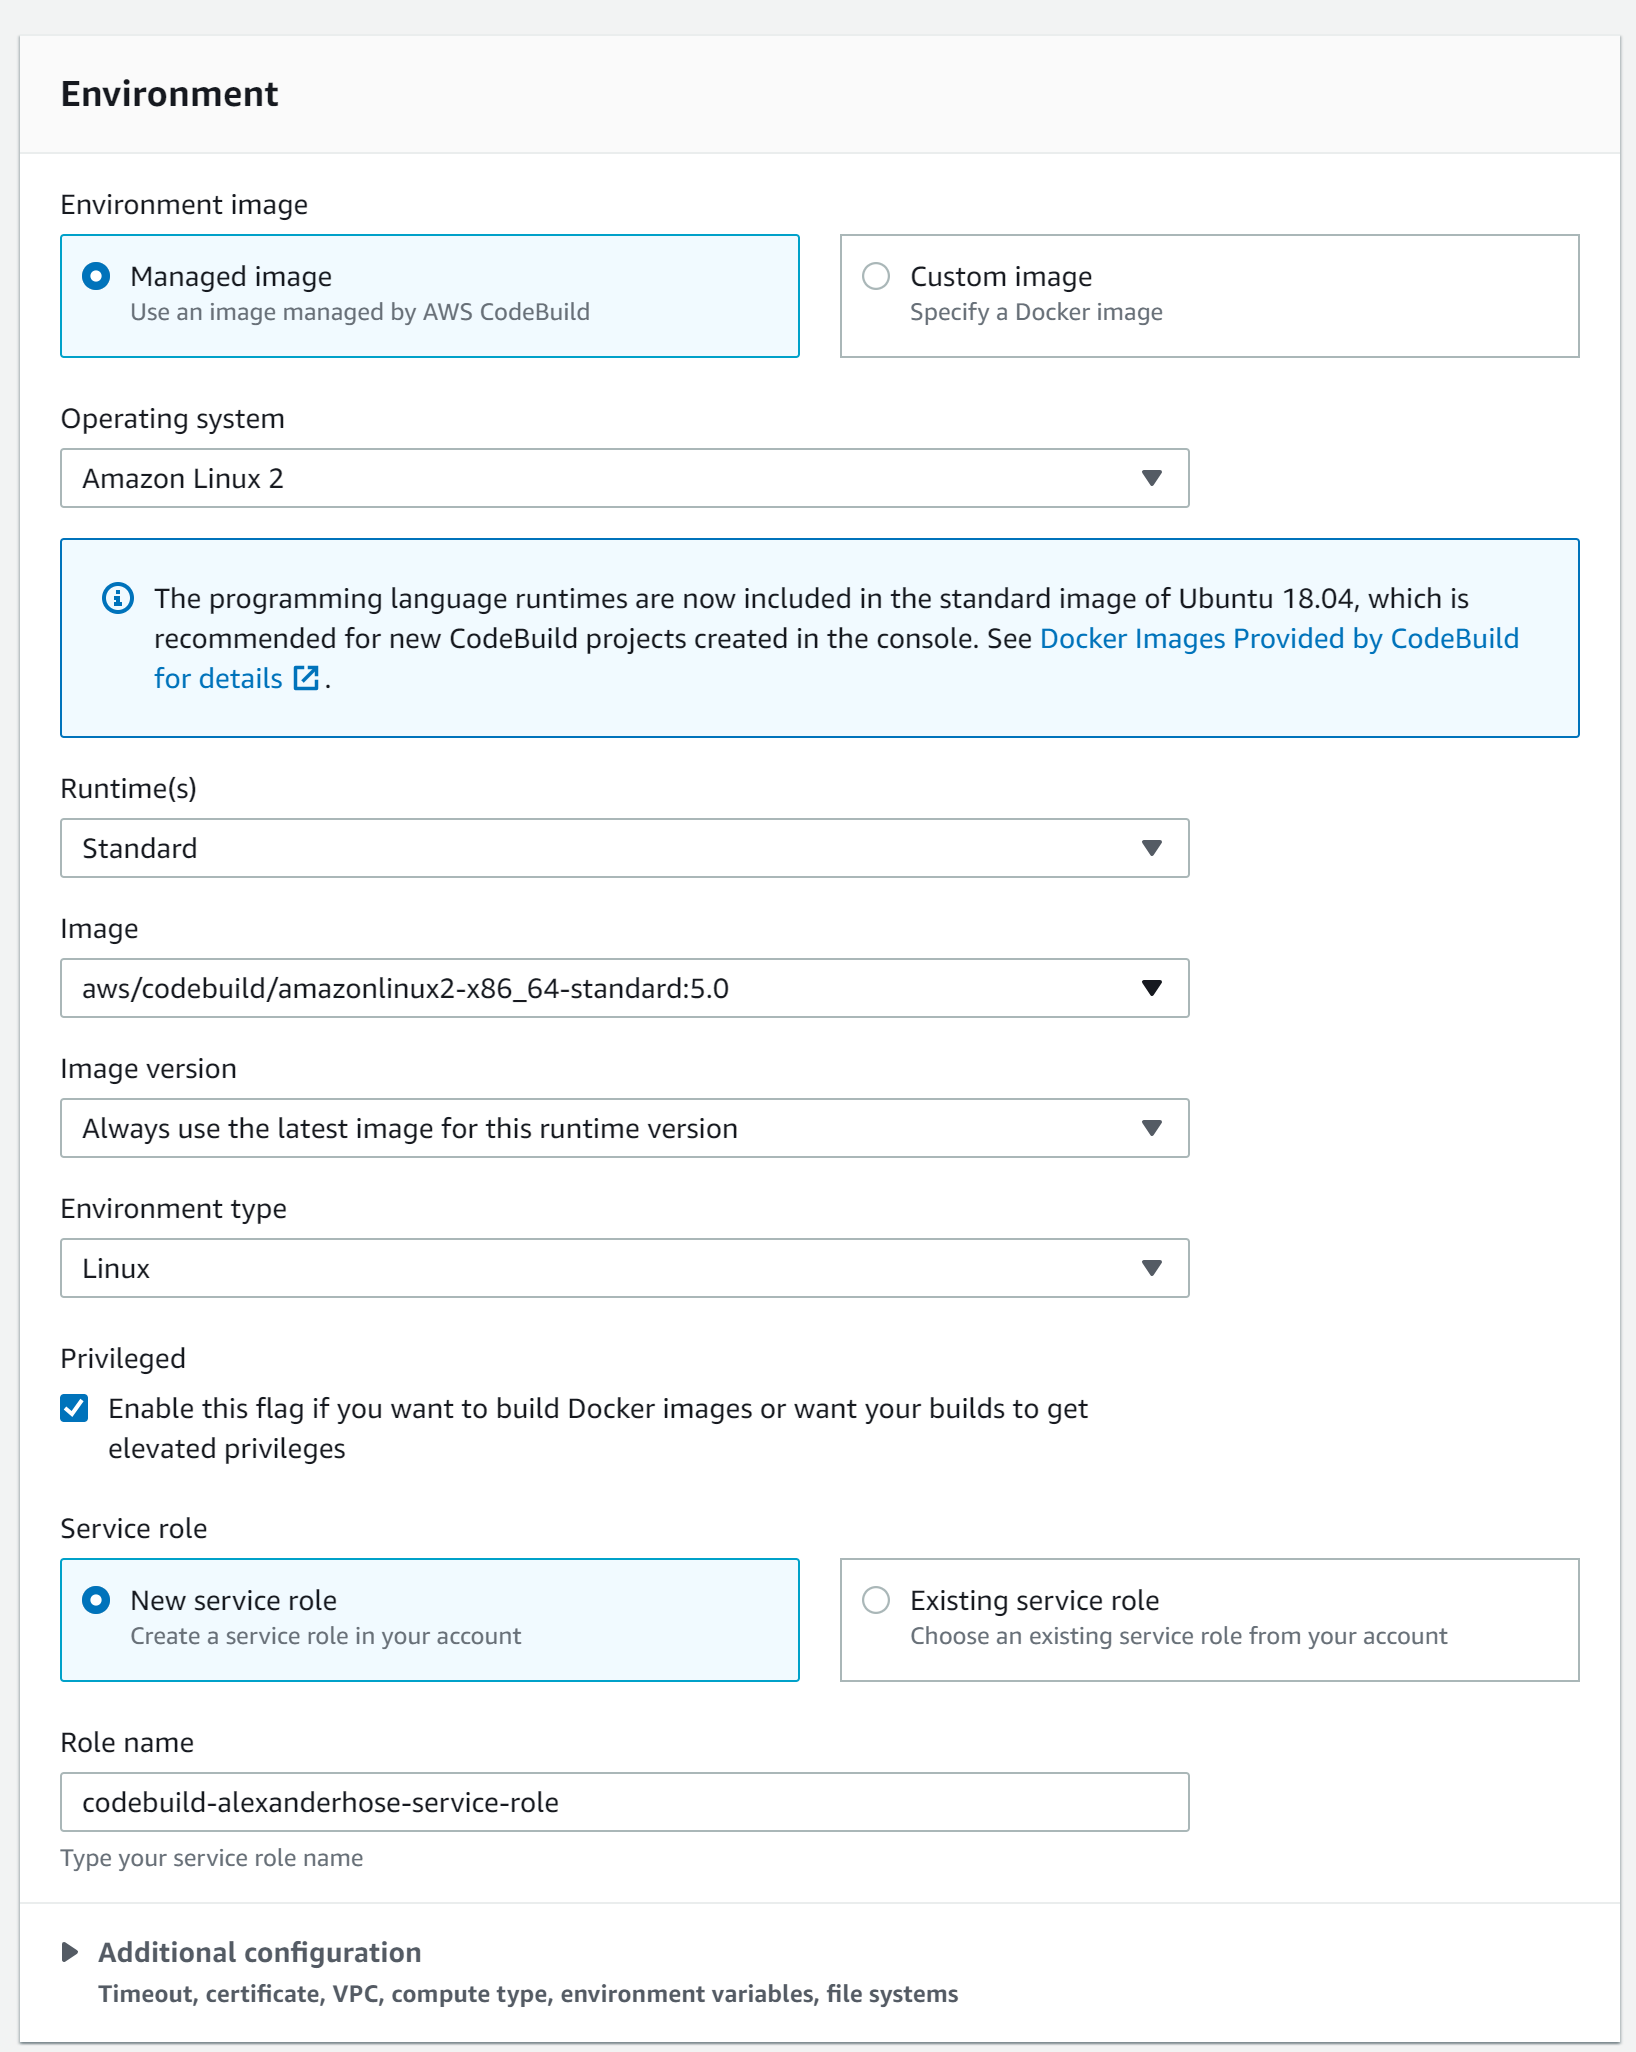
Next, we need to create a new build project in CodeBuild. Here we reference the repository and branch we want to scan.
Depending on if we want to also build a docker image later, we should consider running the build in privileged mode.
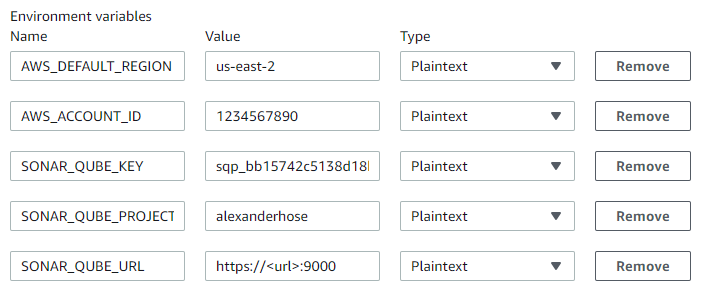
We have referenced some environment variables in the buildspec file. Those can be defined in the additional configuration of the Environment:
CodePipeline
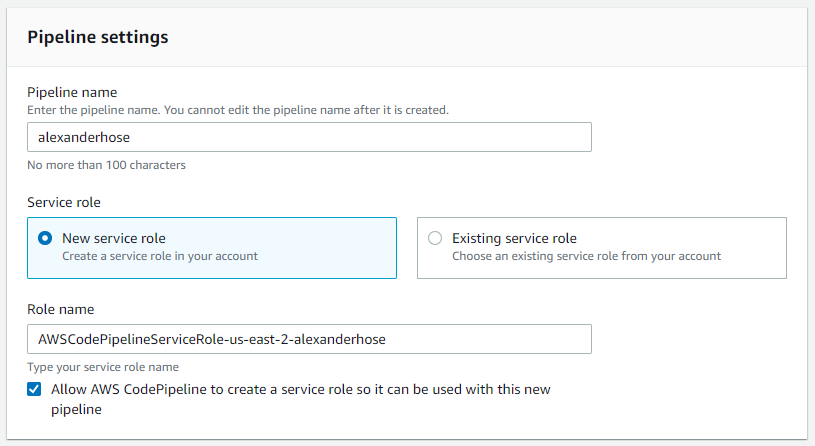
Now we can create the actual pipeline. Navigate to CodePipeline and create a new one.
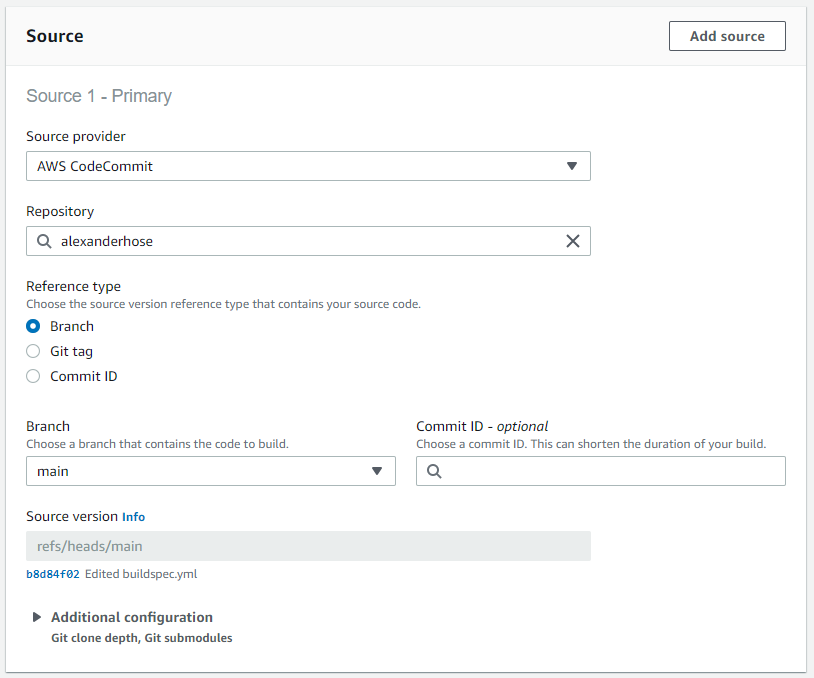
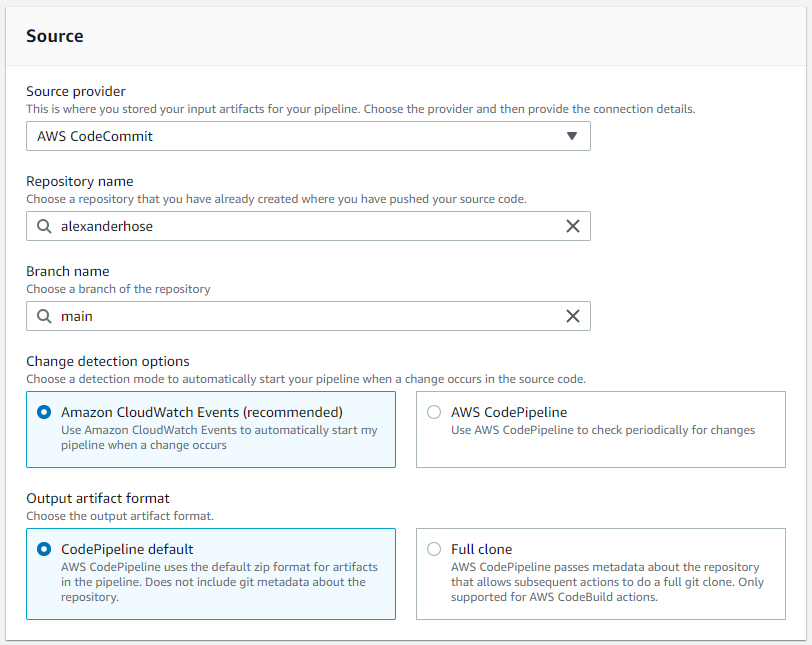
Source
We need to define a source for the pipeline. Here we take the repository from earlier and choose a branch. Every time there will be a change to the branch, the pipeline will be triggered. We can keep the other configuration as default.
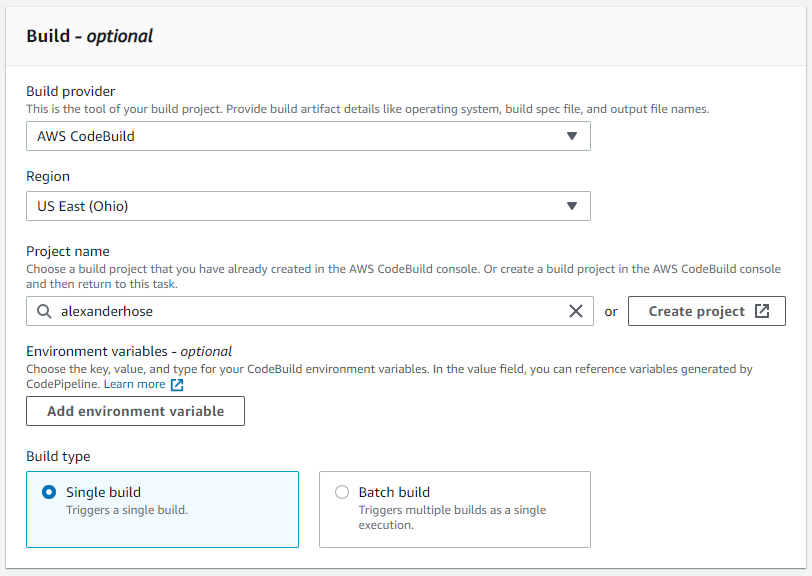
Build
In the build step, we can choose the CodeBuild project we created earlier.
Deploy
The deploy step can be skipped as we don't need to deploy the application anywhere. This could look different in your case.
Run the CodePipeline 🚀
The pipeline will start automatically and we will see a successful build within a few minutes.
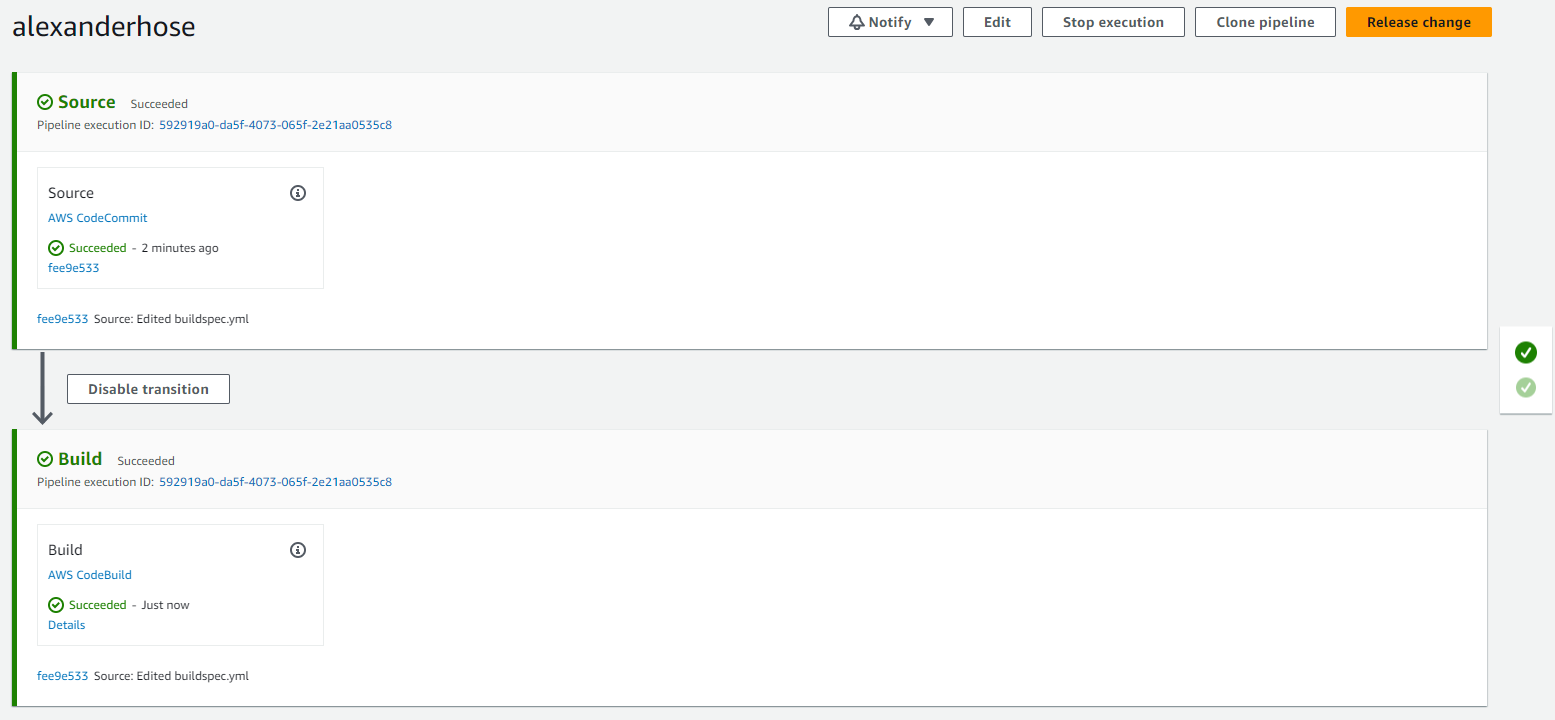
If we go to our SonarQube backend, we will also see information about our bugs, vulnerabilities, code smells, and hotspots.


Join our community of cloud security professionals. 🔐
Subscribe to our newsletterConclusion 🎉
Implementing SonarQube with AWS CodePipeline empowers software development teams to achieve continuous code quality assessment and improvement. 🔍 Combined with the automation capabilities of AWS CodePipeline, the integration streamlines the software release process and promotes reproducibility and consistency in builds. 🔄 Contributing to the delivery of high-quality code. 💯 With SonarQube and AWS CodePipeline, teams can elevate their code quality standards and enhance the overall development process. 📈

Member discussion