


Update:
AWS is constantly adding new modules to its Lambda functions. Those can be added via layers. Before creating custom layers, as outlined in this article, I recommend checking the AWS layers. Navigate to your Lambda function and choose Add Layer at the bottom of the page.

Afterward, you can choose from several AWS-provided layers:
- AWS-AppConfig-Extension
- LambdaInsightsExtension
- AWSCodeGuruProfilerPythonAgentLambdaLayer
- AWSSDKPandas-Python39
- AWS-Parameters-and-Secrets-Lambda-Extension
For an automated approach to creating Lambda layers, check out my latest article, where I outline a more up-to-date process. Some details in this post may be outdated, so I highly recommend referring to the new guide:
 Alexander Hose
Introduction
Did you stumble across the following error when running your Lambda functions before?
{
  "errorMessage": "Unable to import module 'lambda_function': No module named 'pandas'",
  "errorType": "Runtime.ImportModuleError",
  "stackTrace": []
}
It happened to me when I was working with specialized modules like pandas or NumPy. The challenge is that the chosen AWS python runtime doesn't have the pandas module installed. To fix that, AWS is offering layers, which can be added to your Lambda function:
You can configure your Lambda function to use additional code and content in the form of layers. A layer is a ZIP archive that contains libraries, a custom runtime, or other dependencies. With layers, you can use libraries in your function without needing to include them in your deployment package.
Table of Contents
📐 Setup AWS Cloud9 environment
💻 Generate the new layer
📢 Publish new layer to be used by AWS Lambda
🧪 Testing the setup
📐 Setup AWS Cloud9 environment
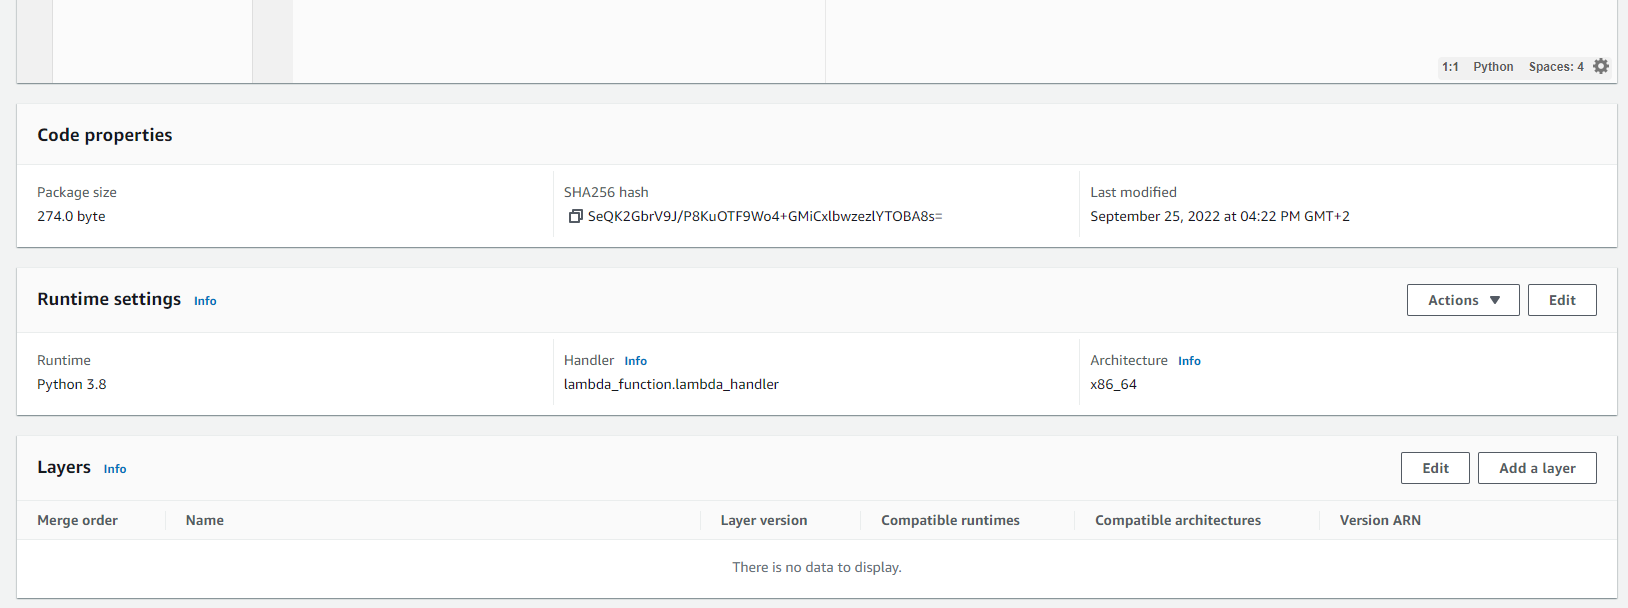
Before we can start creating the layer, we need to identify the Python runtime the function is using to choose the right version of the pandas module. We can find this information at the bottom of the Lambda function page on the AWS console. In this example, the function uses Python 3.8:
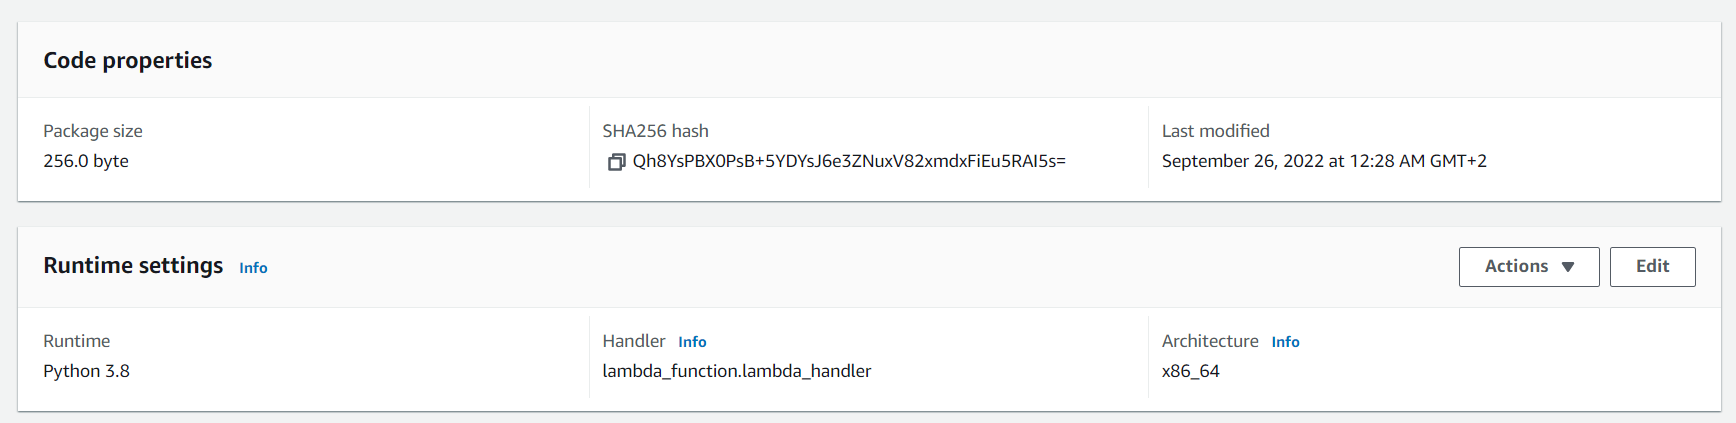
All commands which we are using will be applicable for Python 3.8, if you have a different version, you need to adjust the commands accordingly.
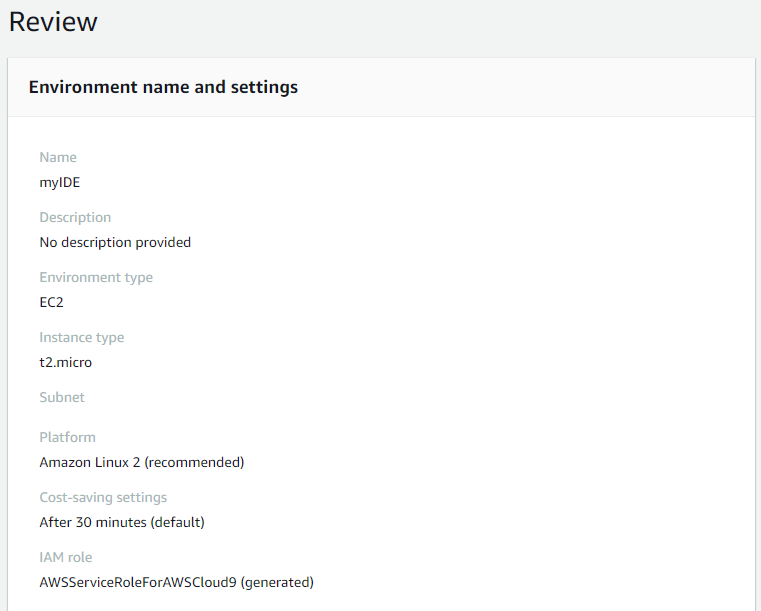
The easiest and quickest way to create a layer is via the AWS Cloud9 IDE. We create a new environment and use the standard configuration of the IDE, no further changes are necessary:
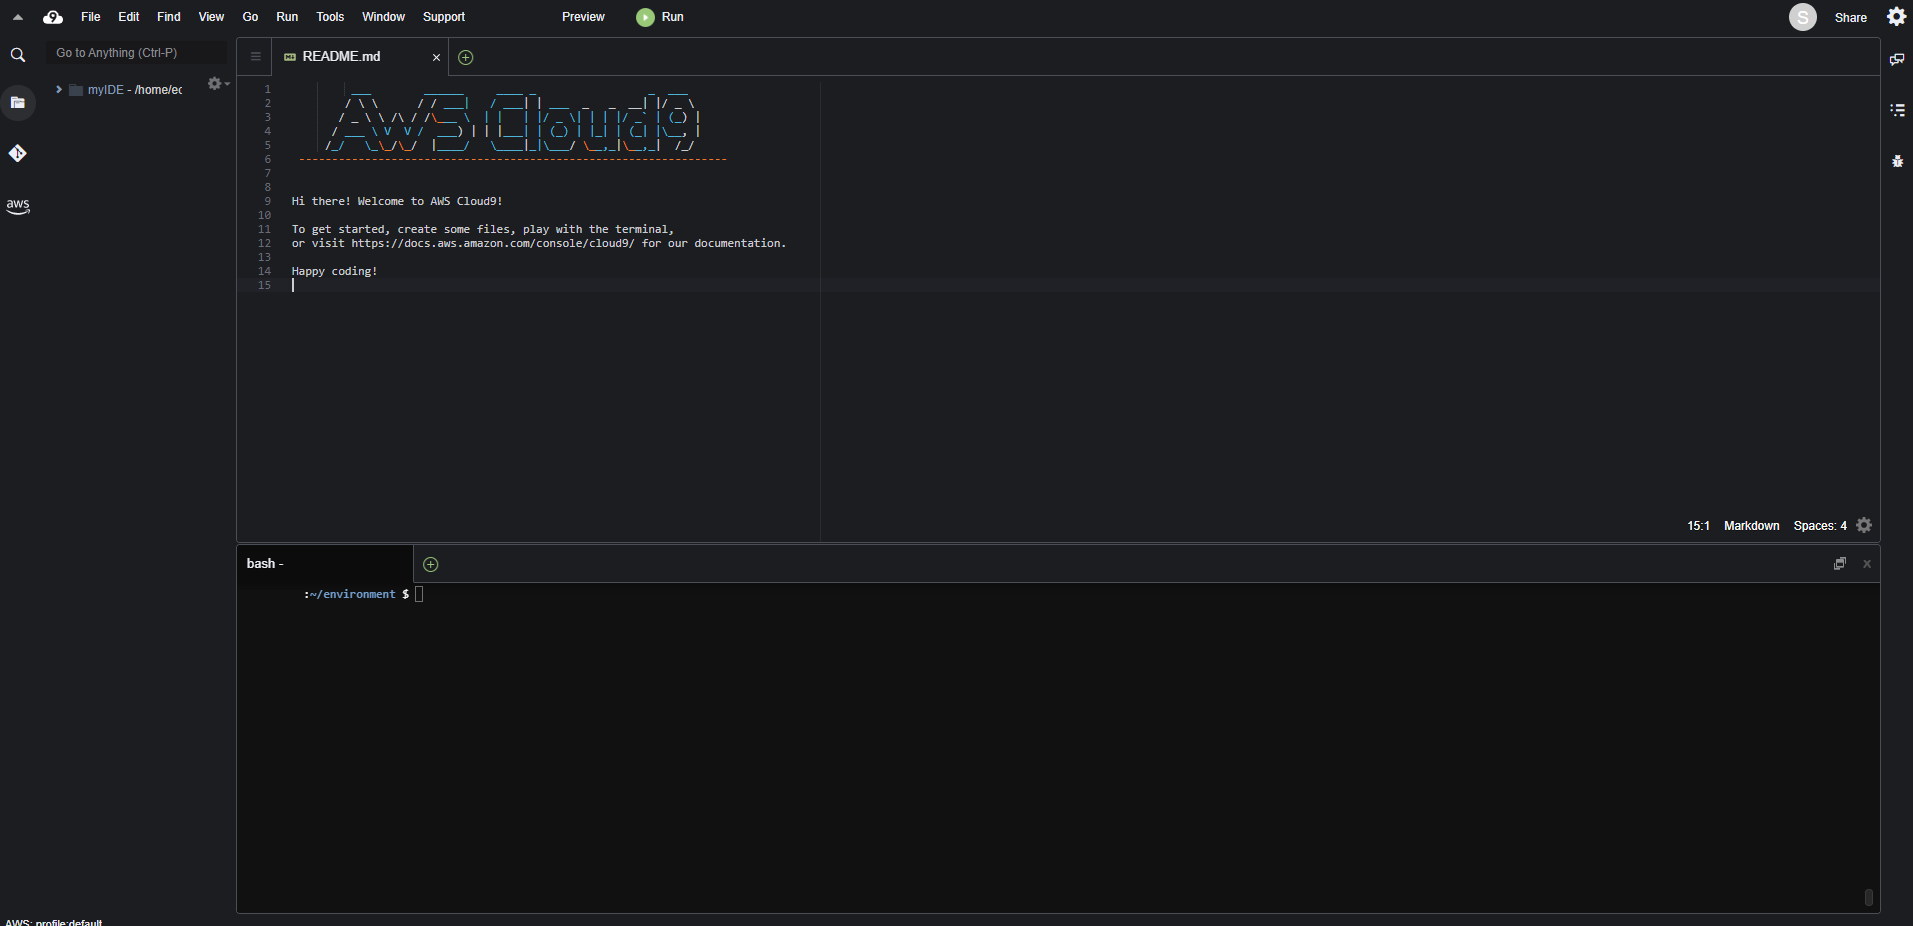
Cloud9 is structured like most modern IDEs. On the left-hand side, we have a directory explorer, where we can create files and navigate through folders. On the left, we have a file editor and a terminal on the bottom half. In this guide we will mainly use the terminal to run commands and create the layer.
On Cloud9, we first check which version of python is currently active:
alexanderhose:~/environment $ python --version
Python 3.7.10
Next, we check if Python 3.8 is already installed:
alexanderhose:~/environment $ ll /usr/bin/python*
lrwxrwxrwx 1 root root    7 Aug 15 20:21 /usr/bin/python -> python2
lrwxrwxrwx 1 root root    9 Aug 15 20:21 /usr/bin/python2 -> python2.7
-rwxr-xr-x 1 root root 7048 May 25 14:31 /usr/bin/python2.7
-rwxr-xr-x 1 root root 1846 May 25 14:31 /usr/bin/python2.7-config
lrwxrwxrwx 1 root root   16 Aug 15 20:21 /usr/bin/python2-config -> python2.7-config
[...]
Unfortunately, this doesn't seem to be the case. So let's install it like we would do on any other Linux distribution and run the yum (Yellowdog Updater, Modified) install command? If we do that, we are greeted with the following error message:
alexanderhose:~/environment $ sudo yum install python38
[...]
No package python38 available.
Error: Nothing to do

python38 is available in Amazon Linux Extra topic "python3.8"

To use, run
# sudo amazon-linux-extras install python3.8
With this information, we can activate python 3.8 and re-run the yum command:
alexanderhose:~/environment $ sudo amazon-linux-extras enable python3.8
[...]
Now you can install:
 # yum clean metadata
 # yum install python38
alexanderhose:~/environment $ sudo yum install python38
[...]
Dependency Installed:
  python38-libs.x86_64 0:3.8.5-1.amzn2.0.3 [...]
Complete!
💻 Generate the new layer
I recommend using a virtual environment so we can easily isolate the module and generate the zip file. A virtual environment has been preinstalled since python 3.3 and is used to create isolated Python environments.
When creating a virtual environment we need to specify the version of python with the -p argument.
alexanderhose:~/environment $ virtualenv venv -p python3.8
Running virtualenv with interpreter /usr/bin/python3.8
[...]
Afterward, we need to run the activation script to enable the virtual environment. If we are inside, we can then install the required modules (You can replace the module name with your desired module):
alexanderhose:~/environment $ source ./venv/bin/activate
(venv) alexanderhose:~/environment $ pip install pandas
[...]
Installing collected packages: pytz, six, numpy, python-dateutil, pandas
Successfully installed numpy-1.23.3 pandas-1.5.0 python-dateutil-2.8.2 pytz-2022.2.1 six-1.16.0
We can use the terminal command deactivate to escape the virtual environment. In the next step, we create the zip file with all required modules inside. First, we need to create a folder with the name python and recursively copy all folders from the virtual environment inside:
alexanderhose:~/environment $ mkdir python
alexanderhose:~/environment $ cp -r ./venv/lib64/python3.8/site-packages/* ./python
Please make sure the folder is called python, if you have several subdirectories like /pandas/python and then zip those folders, it wont work. The python folder needs to be the root folder of the zip file, with all modules inside. Please refer to the right structure here:
Archive:  pandas.zip
Zip file size: 46213494 bytes, number of entries: 7045
drwxrwxr-x  3.0 unx        0 bx stor 22-Sep-25 11:19 python/
drwxrwxr-x  3.0 unx        0 bx stor 22-Sep-25 11:19 python/dateutil/
-rw-rw-r--  3.0 unx      222 tx defN 22-Sep-25 11:19 python/dateutil/__init__.py
[...]
Now we can finally zip the folder:
alexanderhose:~/environment $ zip -r pandas.zip ./python
📢 Publish new layer to be used by AWS Lambda
The AWS API offers a convenient way to publish our new Lambda layer:
alexander:~/environment $ aws lambda publish-layer-version --layer-name pandas --zip-file fileb://pandas.zip --compatible-runtimes python3.8
{
    "LayerVersionArn": "arn:aws:lambda:<region>:<accountid>:layer:pandas:1",
    "Description": "",
    [...]
}
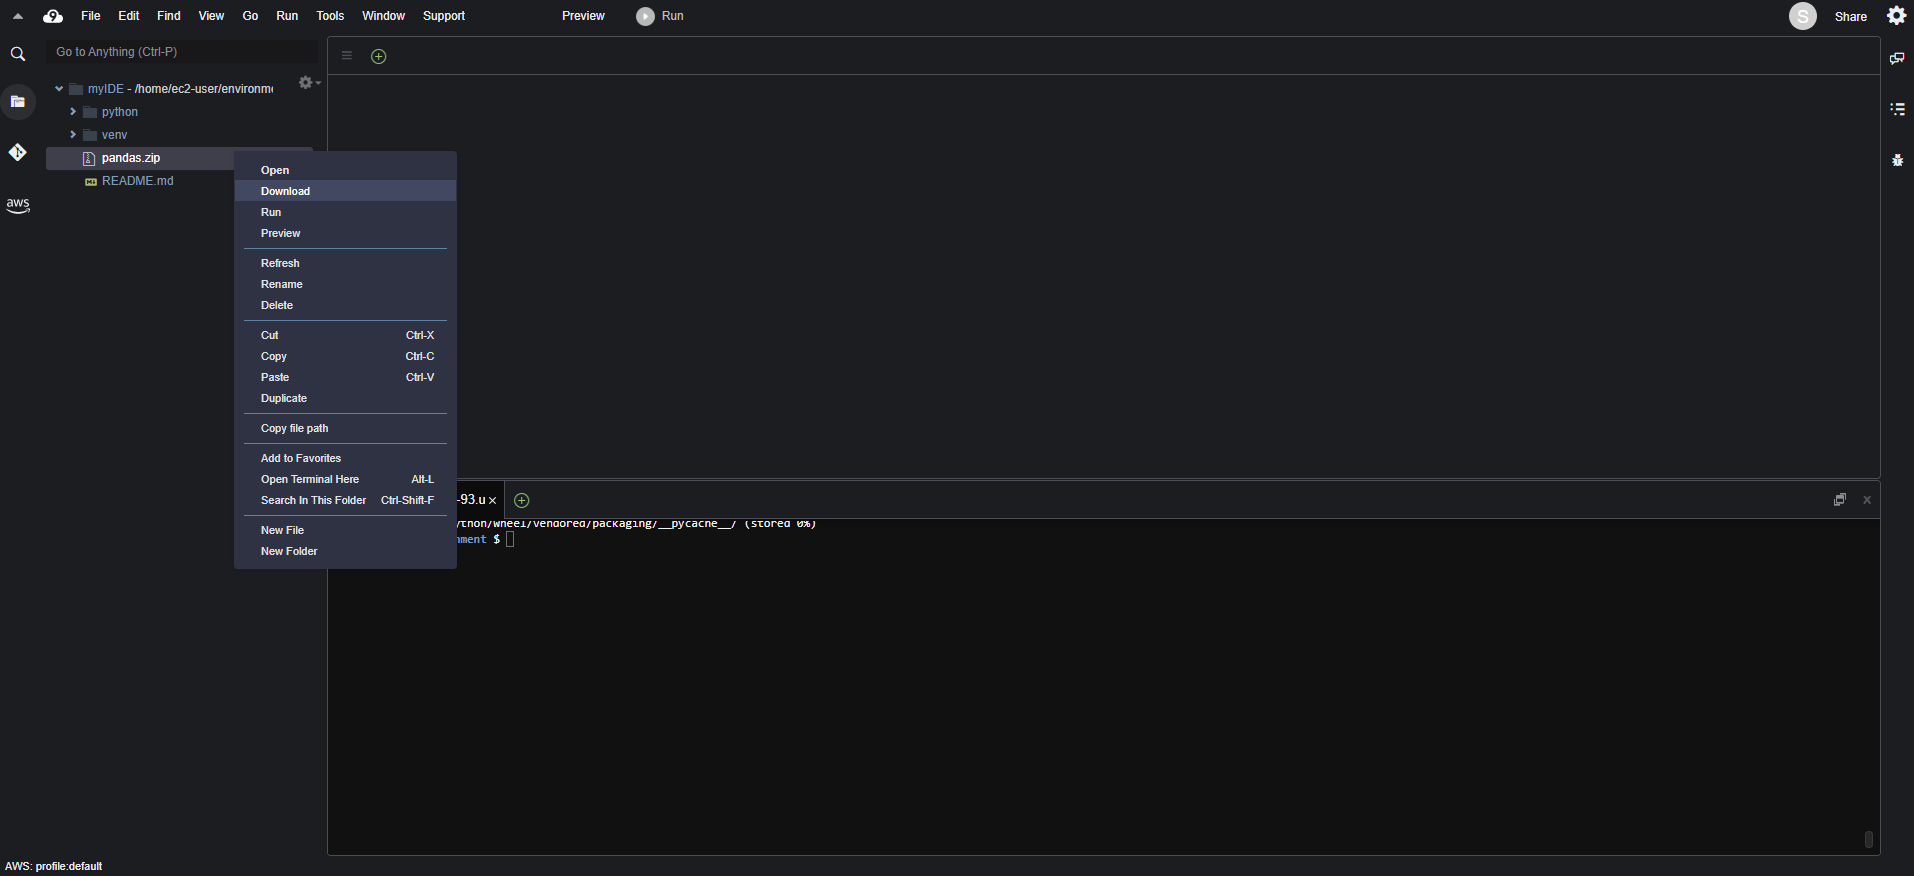
Alternatively, you can also do that manually by uploading the zip file in the AWS Lambda console. To do that we navigate to the directory explorer on the left-hand side and download the pandas.zip file directly from the context menu.
Back on the AWS Lambda console, we need to create a new layer, before we can assign it to the function. On the left-hand side, we choose Layers and Create layer:
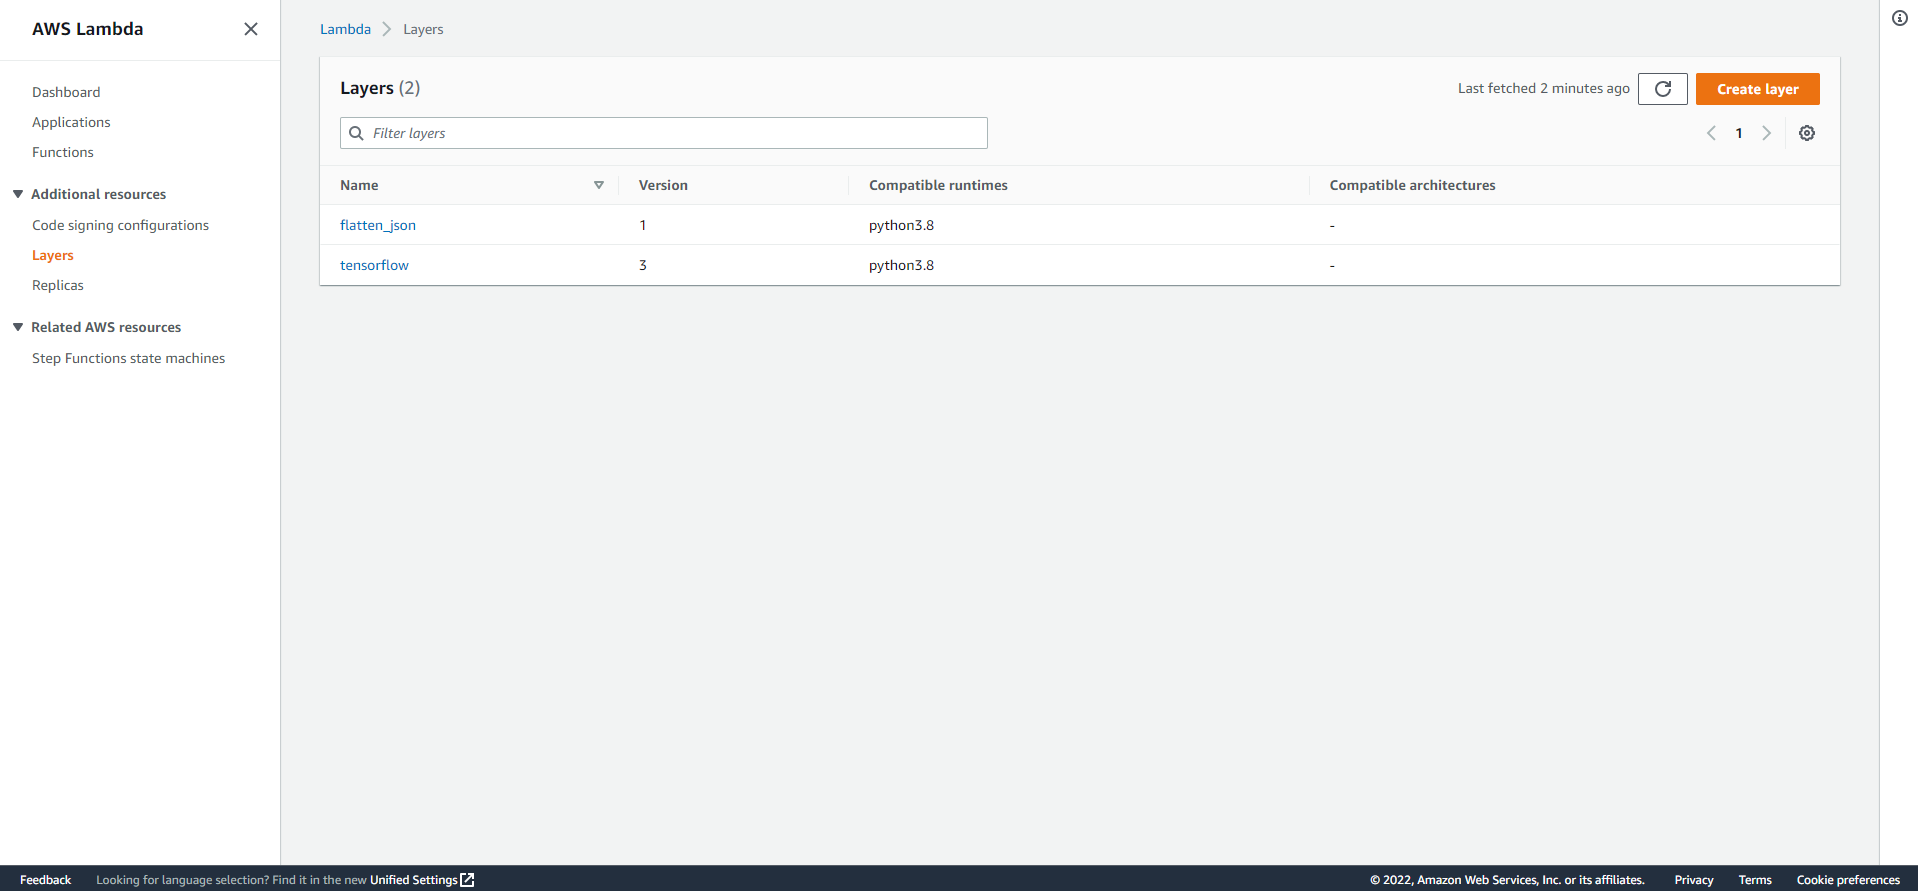
Afterward, we need to give our layer a name, upload the zip file and choose the compatible runtime environments.
Now we can finally go back to the function that we created and scroll all the way to the bottom and choose “Add a layer”:
We should see our custom pandas layer in the dropdown field and assign it to the function.
🧪 Testing the setup
Let's test the function again and confirm everything is working as expected. I have used a small python script and a JSON file as test input for that:
import json
import pandas as pd

def lambda_handler(event, context):
    guardDutyJSON = json.dumps(event)
    df = pd.json_normalize(event)
    print(df)
{
    "schemaVersion": "2.0",
    "accountId": "123456789012",
    "region": "us-east-2",
    "partition": "aws",
    "type": "Backdoor:EC2/DenialOfService.Tcp",
    "resource": {
        "resourceType": "Instance",
        "instanceDetails": {
            "instanceId": "i-99999999",
            "instanceType": "m3.xlarge"
        }
    },
    "service": {
        "serviceName": "guardduty",
        "resourceRole": "ACTOR",
        "eventFirstSeen": "2022-09-06T14:57:50.000Z",
        "eventLastSeen": "2022-09-18T11:49:50.000Z",
        "archived": false,
        "count": 7
    },
    "severity": 8,
    "createdAt": "2022-09-06T14:57:50.501Z",
    "updatedAt": "2022-09-18T11:49:50.521Z",
    "title": "EC2 instance i-99999999 is behaving in a manner that may indicate it is being used to perform a Denial of Service (DoS) attack using TCP protocol.",
    "description": "EC2 instance i-99999999 is behaving in a manner that may indicate it is being used to perform a Denial of Service (DoS) attack using TCP protocol."
}
In the end, we should see the output without any errors.
schemaVersion     accountId  ... service.archived service.count
0           2.0  123456789012  ...            False             7
[1 rows x 19 columns]


Member discussion