


Introduction
In the current digital landscape, businesses are faced with an increasing number of cybersecurity threats. It is crucial to have robust security measures in place to protect sensitive data and maintain business continuity. One solution that can help is the Google Cloud Platform (GCP) Cloud Intrusion Detection System (IDS). This article will discuss the importance of using GCP Cloud IDS to defend your business and provide insights into its features and implementation. 🔒
GCP Cloud IDS provides several benefits that can help businesses strengthen their network security. With improved network visibility, businesses can better understand potential threats. Real-time monitoring and alerts allow for swift responses to potential intrusions. Moreover, the scalability and flexibility of GCP Cloud IDS can cater to the changing needs of growing businesses, ensuring that security measures can adapt as the business expands. 🚀
We are setting up the Cloud IDS service and observing the traffic in certain subnets of our VPC environment.
Prerequisites 📚
You need to enable the following APIs:
- Service Networking API
- Cloud IDS API
- Cloud Logging API
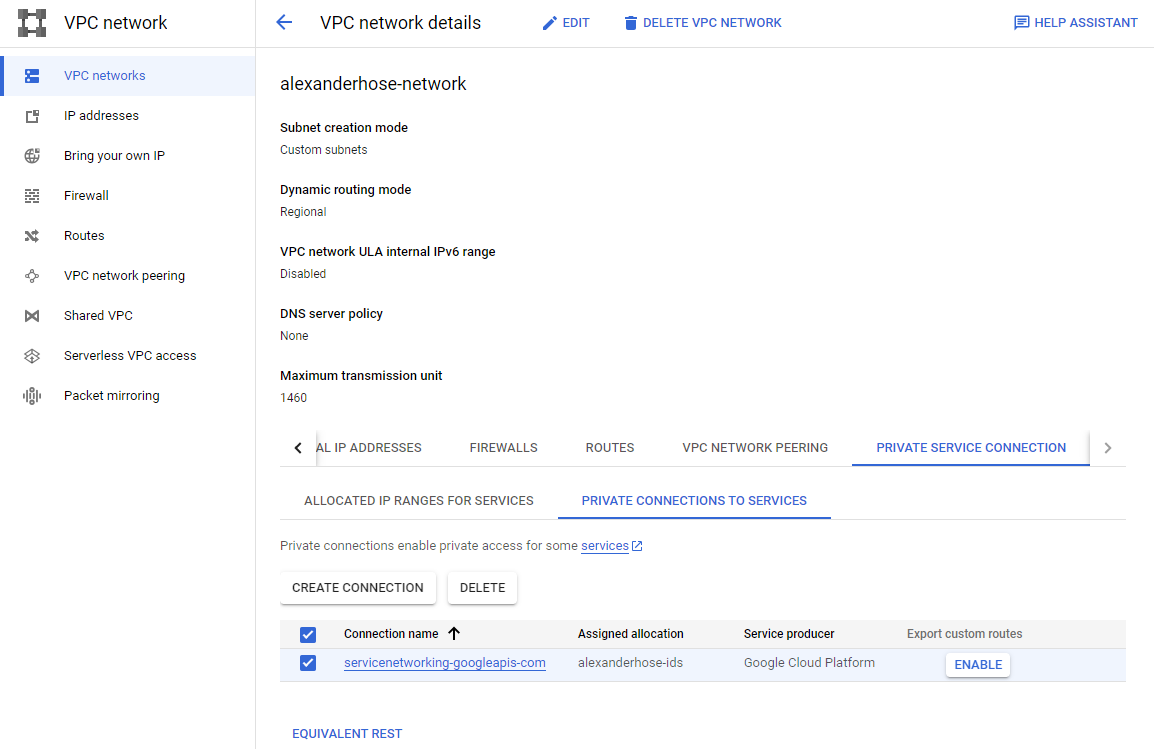
Enable Private Service Access in the VPC 🔏
Private Service Access is a feature that allows you to securely connect to Google-managed services like Cloud IDS without going through the public internet. It enables you to access specific Google services from your Virtual Private Cloud (VPC) network, providing a more secure and controlled network environment.
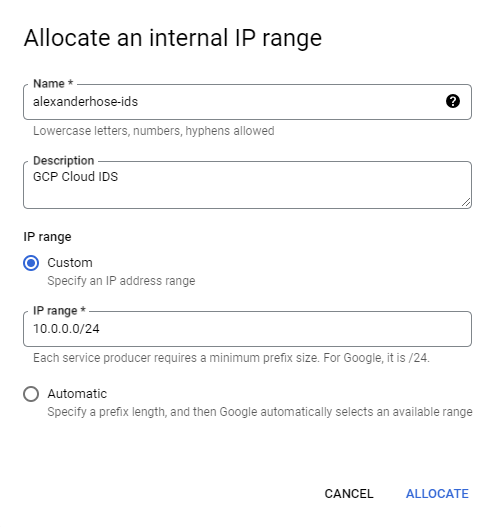
Let's navigate to the VPC network, which you want to protect with Cloud IDS. There we need to navigate to private service connection. Then we need to allocate an IP range first. Make sure it doesn't collide with any existing subnets.

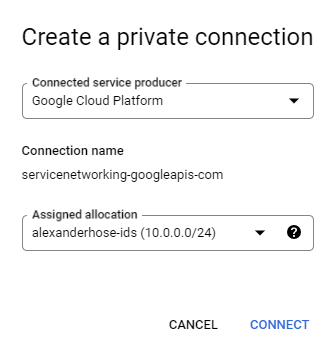
In the same section, we need to create a private connection. Choose Google Cloud Platform as the connected service producer and the newly created IP range.
Create Cloud IDS endpoint 🔍
GCP Cloud IDS endpoints are specific network devices where the Cloud IDS system collects the network traffic. The endpoint acts as a sensor or monitoring point within your GCP infrastructure. It can be assigned to a certain VPC network and region.
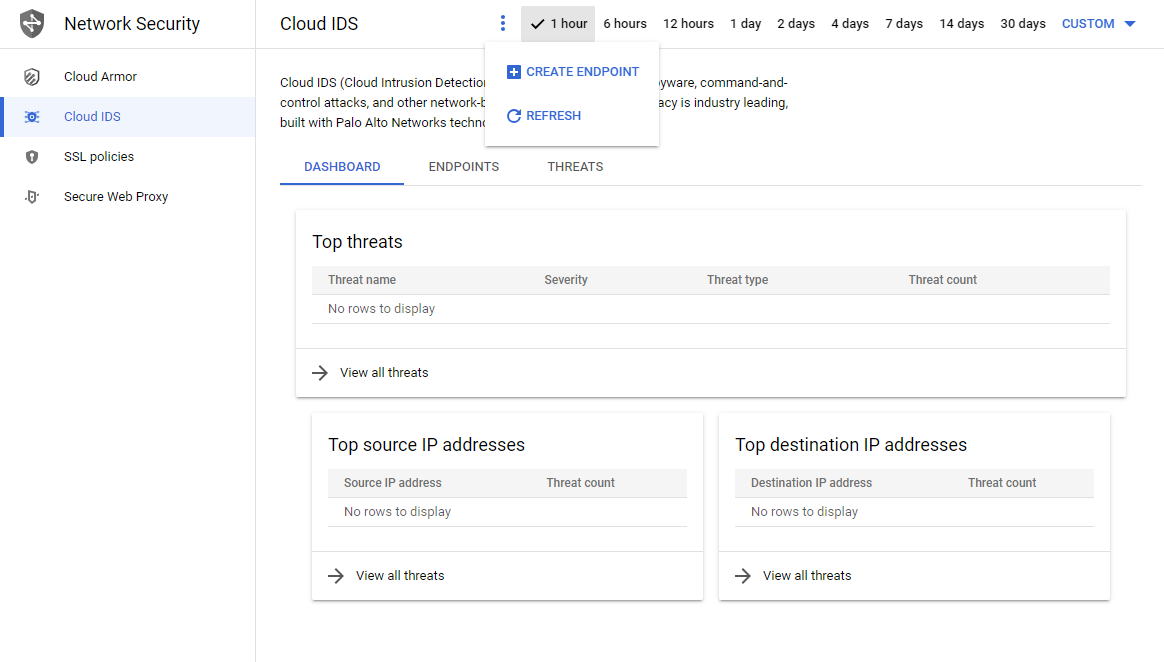
To set up the endpoint, we can now finally open the Cloud IDS console. Click on create endpoint, choose your VPC network, region and zone. The endpoint will monitor all traffic which is flowing in the region, the zone doesn't influence this capability.

Next, we can configure which level of threat severity should be shown and if any exceptions should be made.
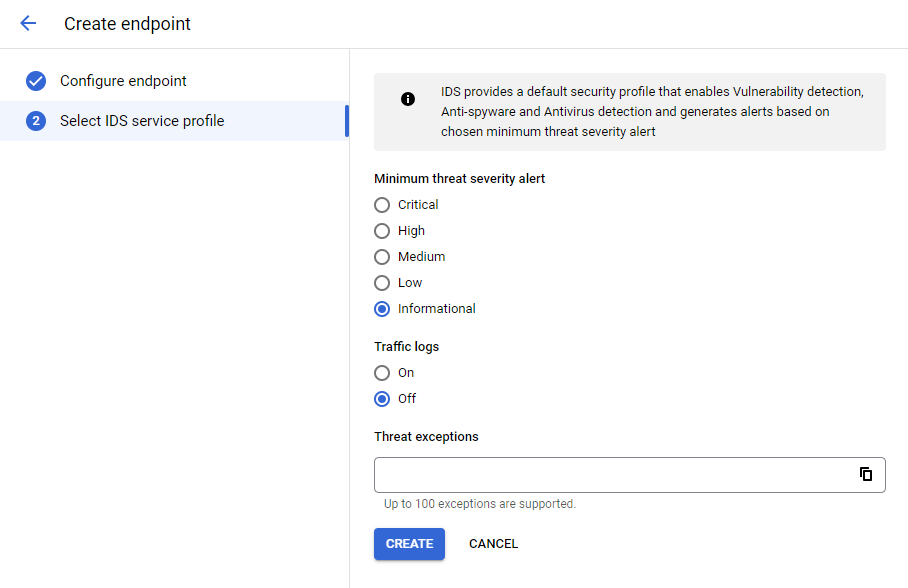
Creating the endpoint can take up to 15 minutes.
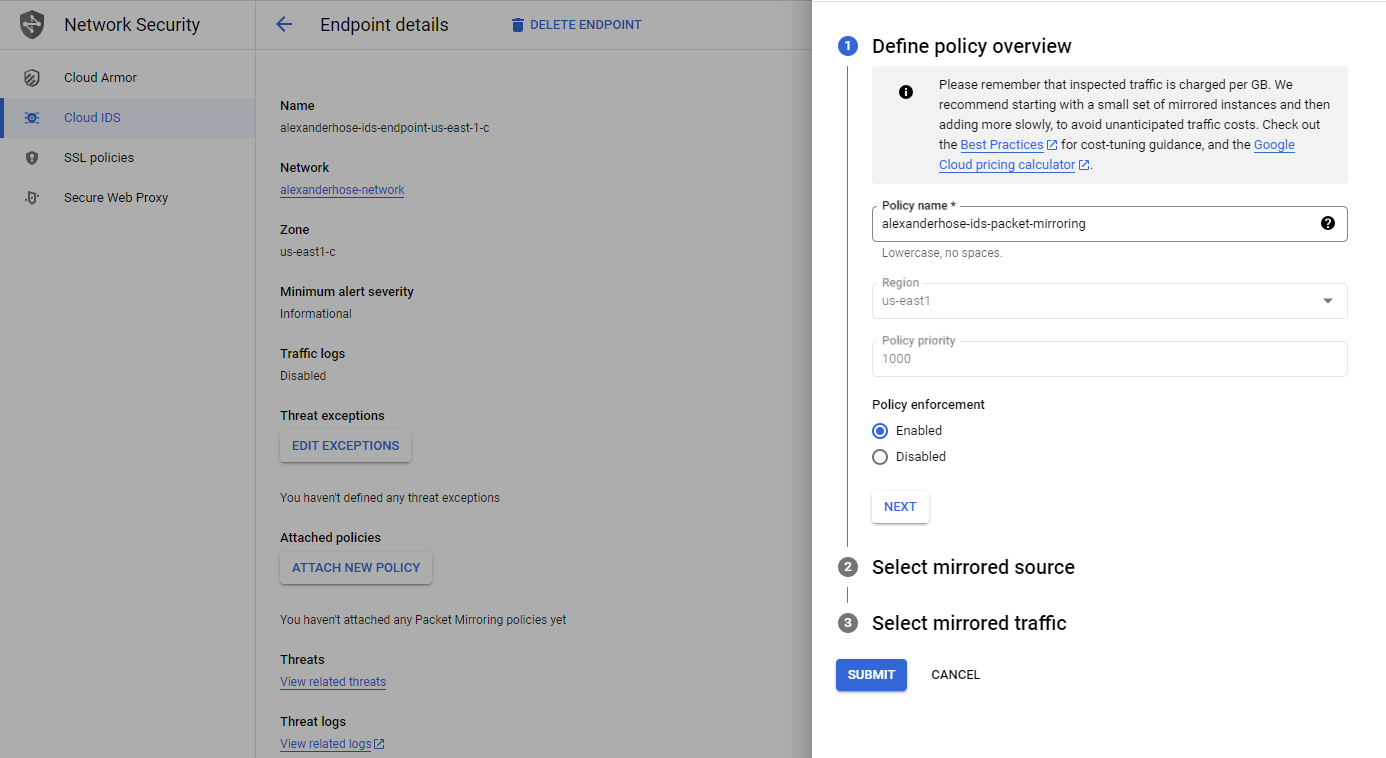
Attach policy to endpoint
Select the endpoint and click attach new policy. It is important to directly do it at the endpoint and not via the network mirroring service.
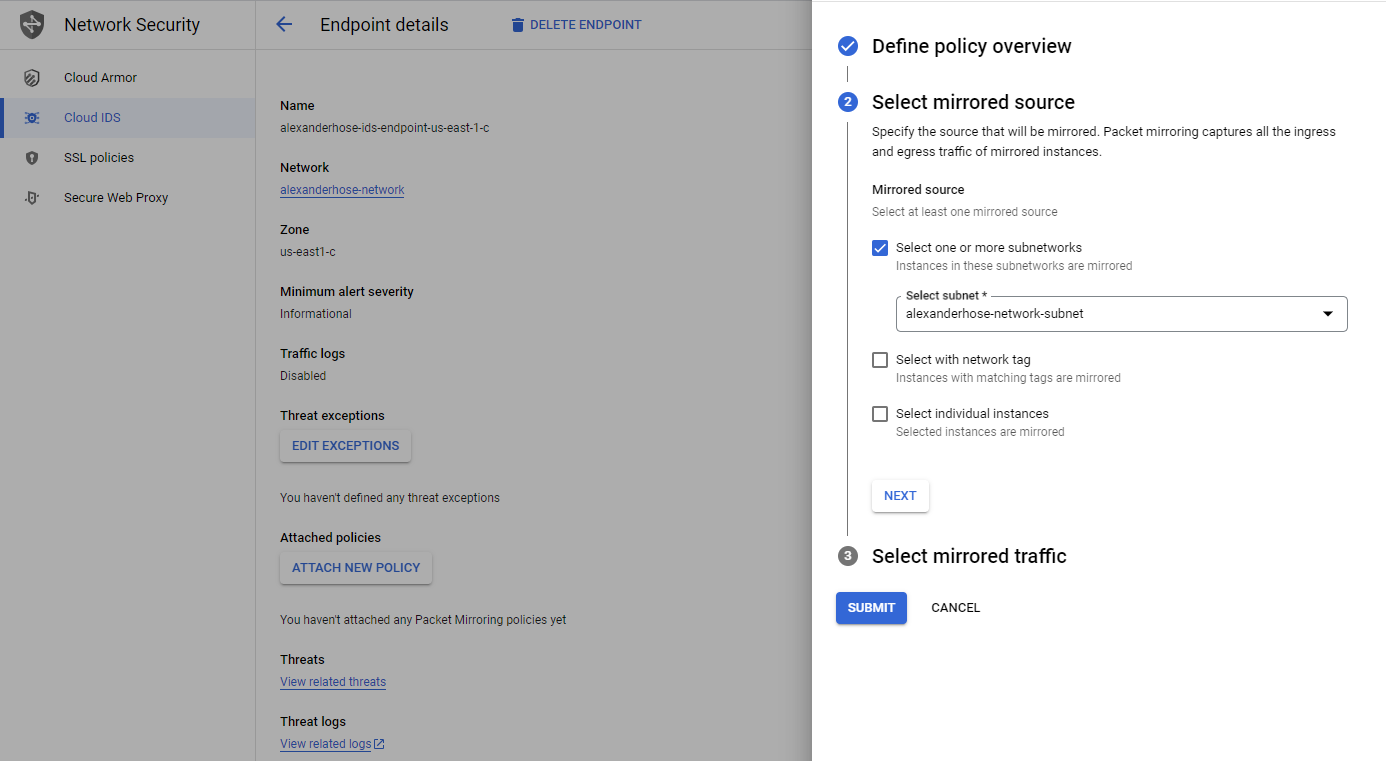
Next, you can select the subnets in the same region as the endpoint. You can also choose to mirror traffic based on network tags or specific instances.
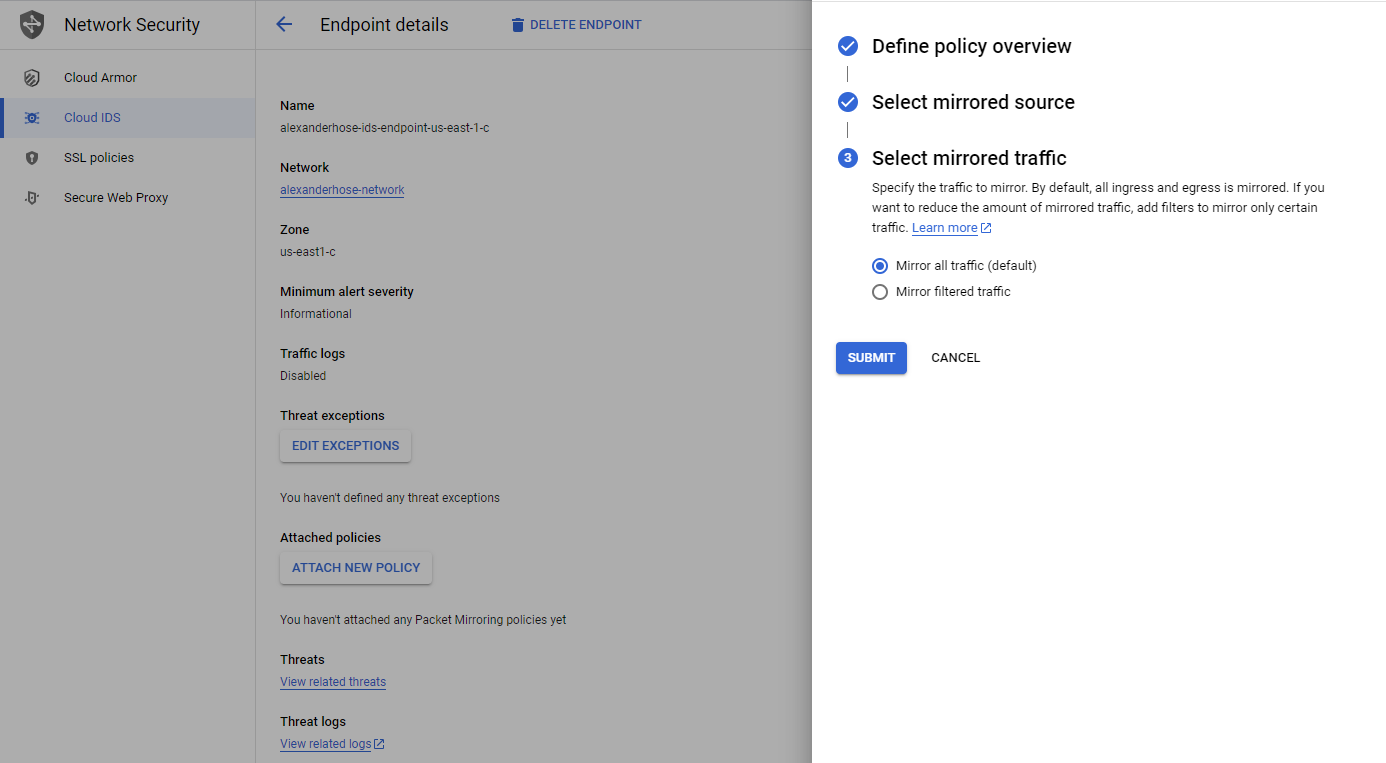
In the last step, we can specify which traffic should be mirrored. Click submit and the policy will be attached to the endpoint.
Investigate threats in Cloud IDS 🔥
All traffic that is mirrored by the policy will be analyzed by Cloud IDS. In the dashboard, we can see the different attacks and their severity.
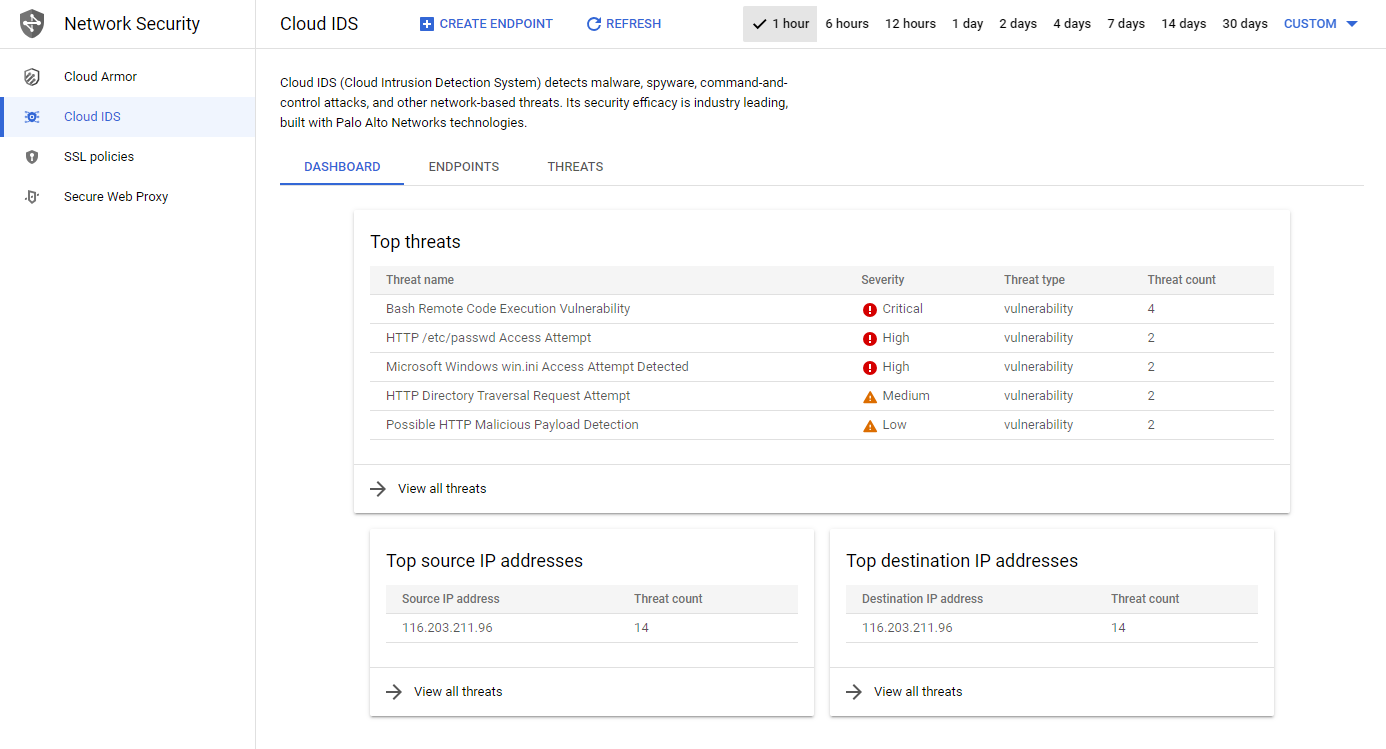
If we navigate to the threats tab, we get a more detailed explanation about the threat including the attacked server. From there we can take mitigation actions, to block the IP address for example.

Conclusion 🎉
In conclusion, deploying GCP Cloud IDS is a crucial step in enhancing the security of your GCP infrastructure. With GCP Cloud IDS, you can enjoy the benefits of proactive intrusion detection and protect your cloud resources and data from unauthorized access.
We hope this guide has provided you with a comprehensive understanding of how to deploy GCP Cloud IDS. Implement these steps to enhance the security of your cloud environment. Share your thoughts in the comments below. 📝


