


Introduction
Are you tired of manually pushing Docker images to Artifact Registry? 🙋♀️🙋♂️ This time-consuming task can be tedious and error-prone. 😩
But fret not! 😉 I'm here to introduce you to a more efficient solution: automating the process with Cloud Build. 🚀 With Cloud Build, you can easily build and push your Docker images to Artifact Registry with just a few clicks. 👍
So, grab your favorite cup of coffee ☕️, settle in, and let's start. 🚀
GCP Cloud Build: Your One-Stop Shop for Building and Deploying Software
GCP Cloud Build is a serverless continuous integration and continuous delivery (CI/CD) platform that lets you build, test, and deploy your software quickly and easily. It can be used to build and deploy code in all programming languages, including Java, Go, Node.js, and more.
Essential Roles for a Smooth Build Process
To ensure a seamless build process, you'll need to grant the following three roles to the service account attached to your Cloud Build project:
- Artifact Registry Reader: This role allows the service account to read Docker images from Artifact Registry.
- Artifact Registry Writer: This role allows the service account to push Docker images to Artifact Registry.
- Logs Writer: This role allows the service account to write logs to Cloud Logging, which can be helpful for debugging build failures.
- Cloud Source Reader: A custom role depending on the source code repository. In case of Cloud Source you need to assign the permission
source.repos.get.
Creating a Cloud Build Project
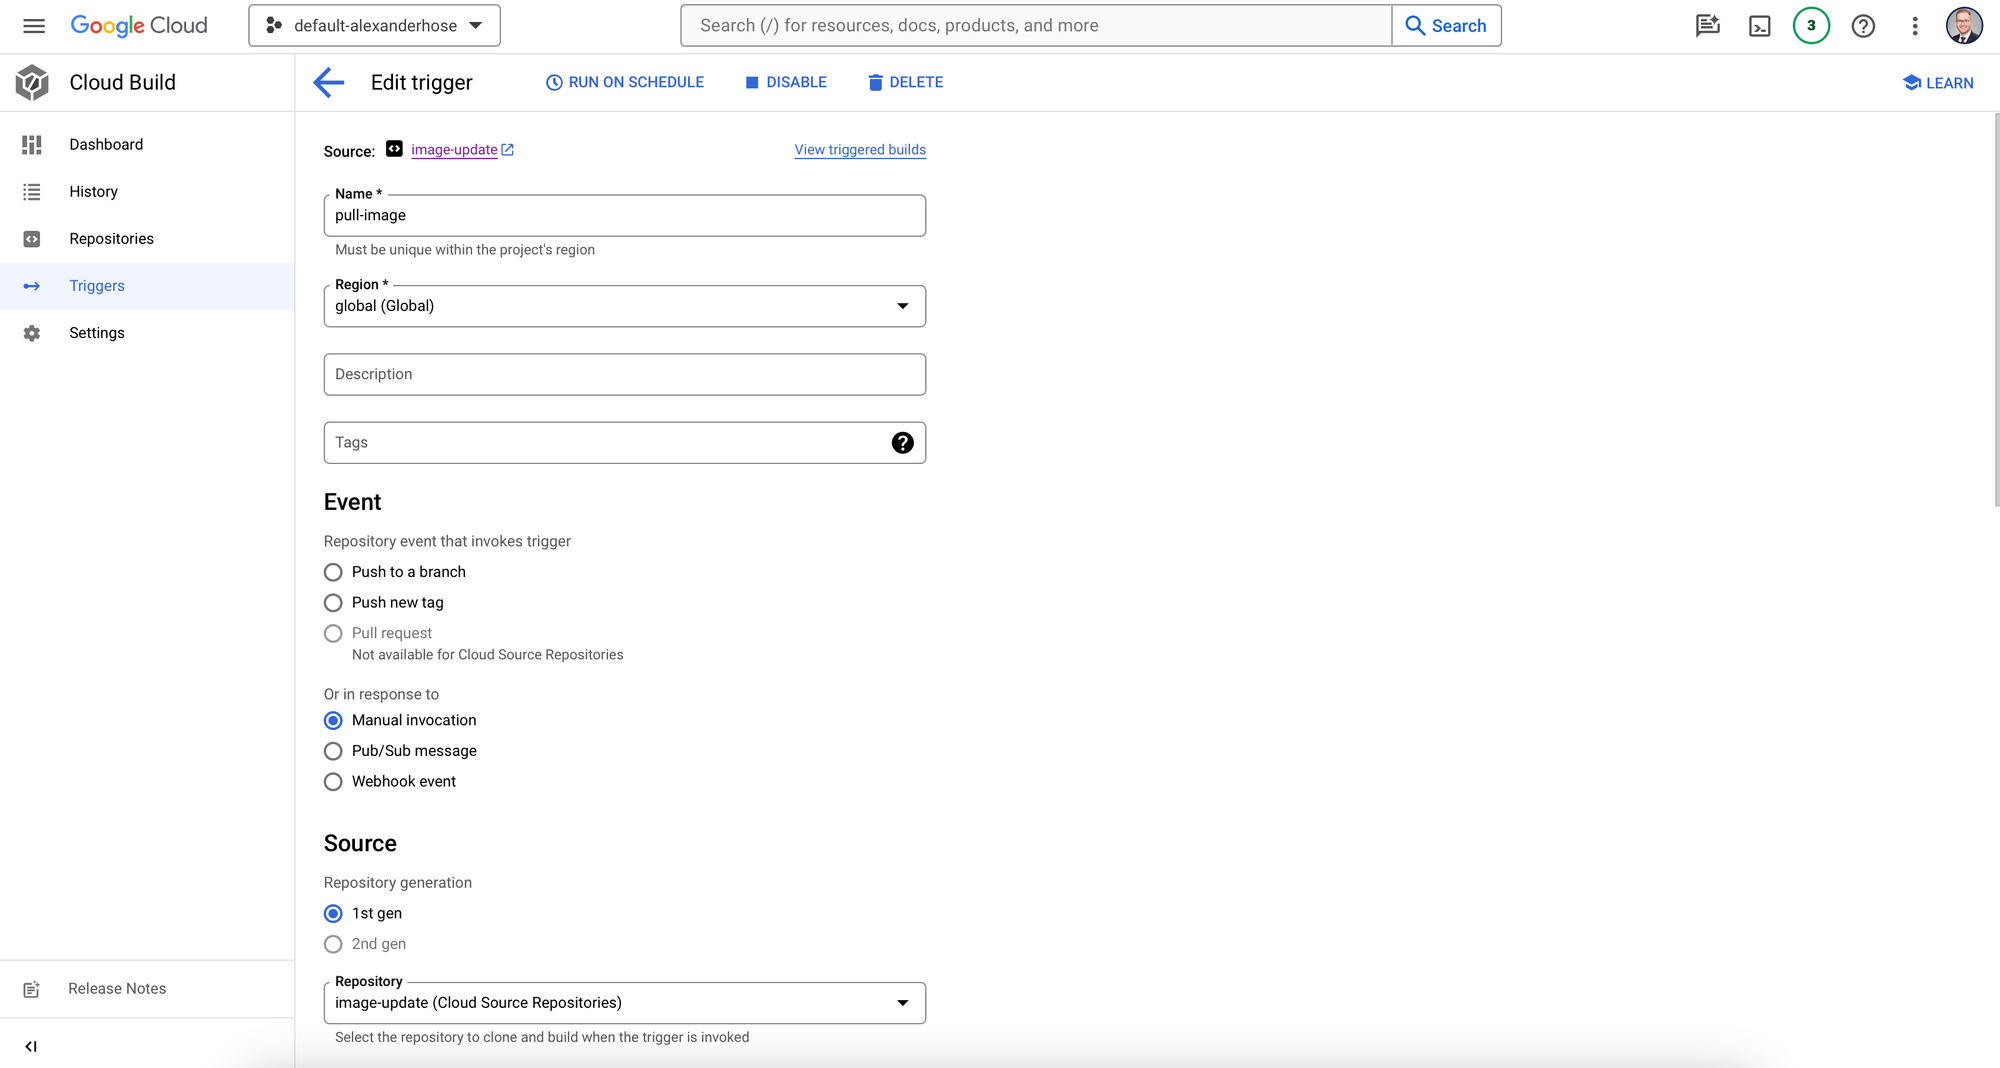
- Create a Cloud Build trigger: A Cloud Build trigger is a way to automatically start a build when something happens, such as a change to your source code. In my case I am using a manual trigger.
- Choose the source where the configuration file is stored: When creating the trigger, you will need to choose the source where the configuration file is stored. This can be a GitHub, Bitbucket, or a Cloud Source repository.
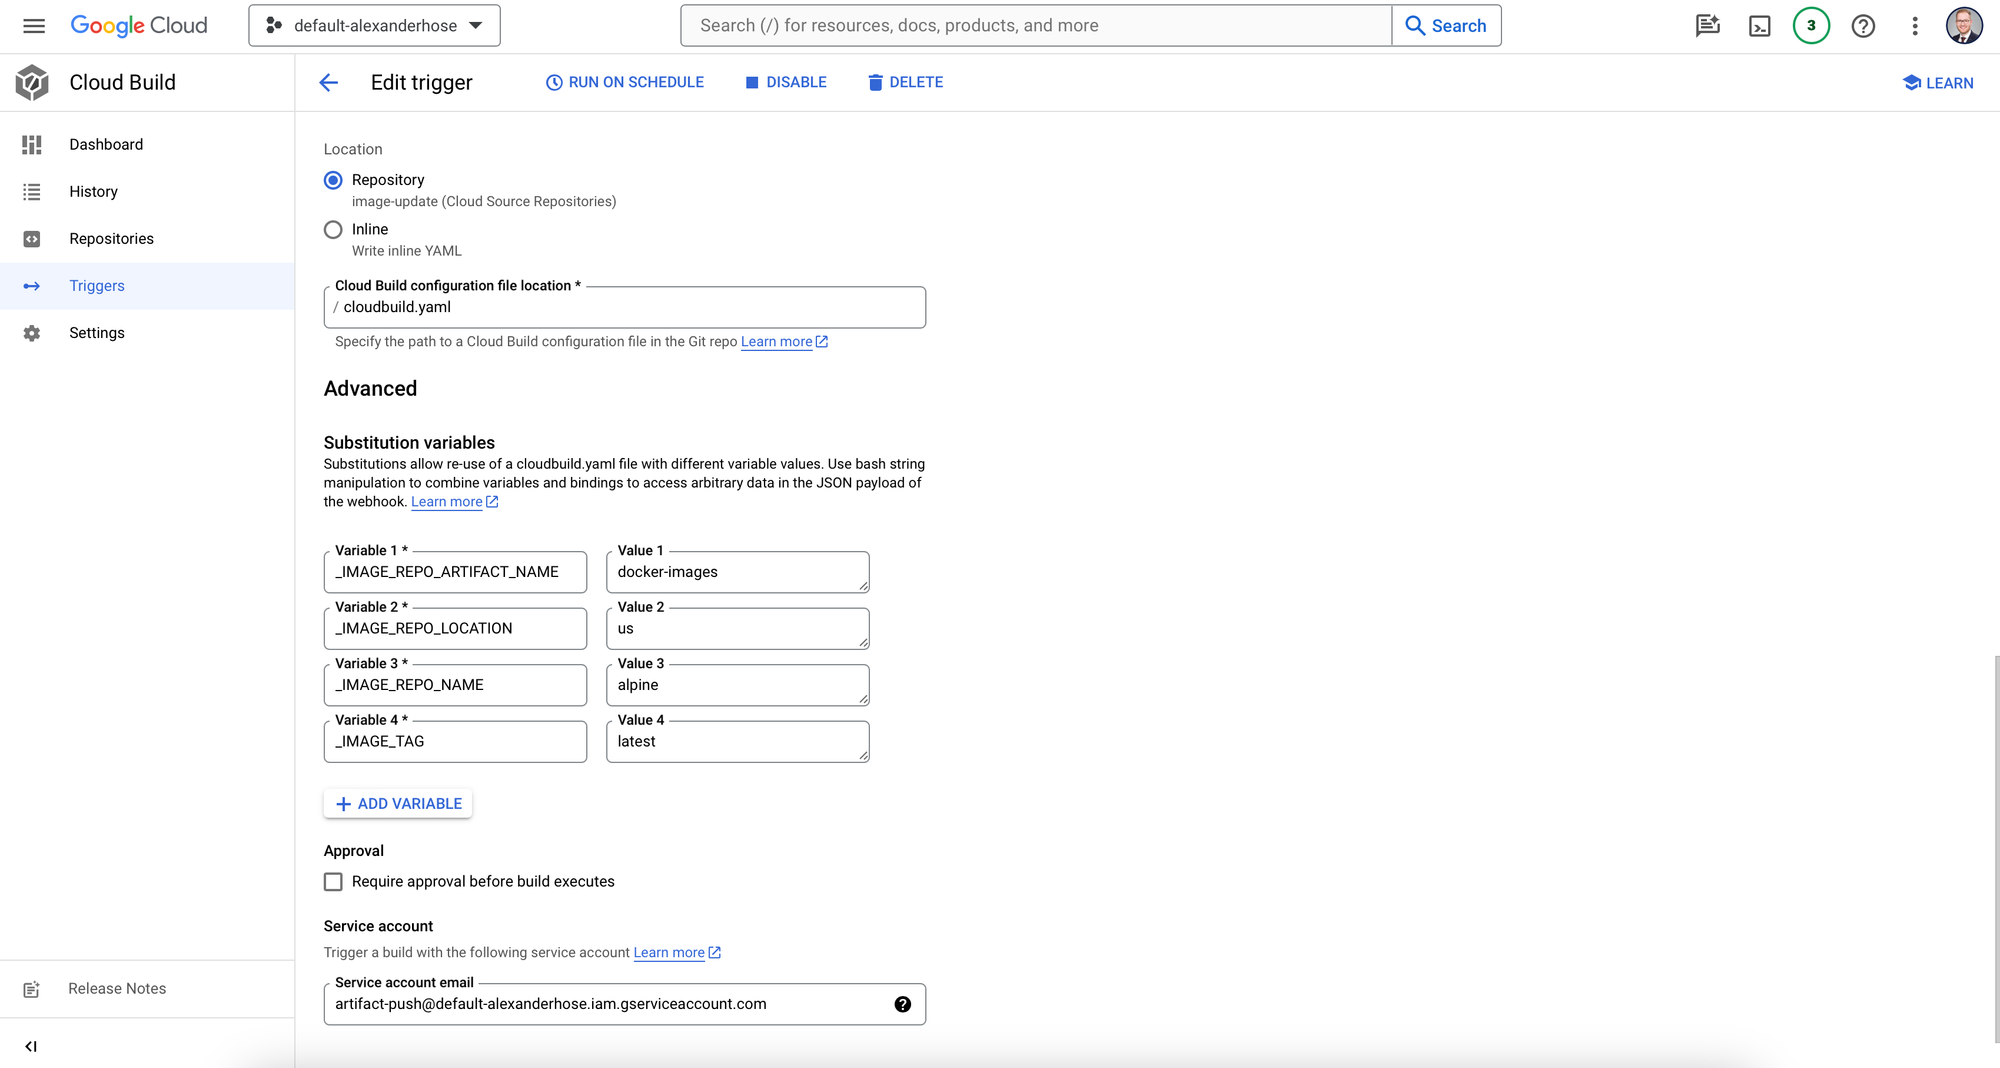
- Set Substitution variables: Substitution variables allow you to replace placeholders in our configuration file with actual values. This can be useful for things like specifying the project ID or the name of your Docker image. In the configuration file I am using the following variables:
- _IMAGE_REPO_ARTIFACT_NAME: Artifact Registry repository name
- _IMAGE_REPO_LOCATION: Artifact Registry repository location
- _IMAGE_REPO_NAME: Name of the image to pull
- _IMAGE_TAG: Tag of the public image to pull
- Add the service account: You will need to add the service account that Cloud Build will use to access your repositories. This service account will need the necessary permissions from above to perform the build steps.
Building and Pushing Docker Images with Cloud Build
Create a Cloud Build configuration file: A Cloud Build configuration file is a YAML file that tells Cloud Build how to build your project. You'll need to create a configuration file that tells Cloud Build to pull your Docker image and push it to Artifact Registry.
steps:
  - name: gcr.io/cloud-builders/docker
    #Pulling public image
    args:
    - pull
    - ${_IMAGE_REPO_NAME}:${_IMAGE_TAG}
  - name: gcr.io/cloud-builders/docker
    #Tagging image
    args:
    - tag
    - ${_IMAGE_REPO_NAME}:${_IMAGE_TAG}
    - ${_IMAGE_REPO_LOCATION}-docker.pkg.dev/${PROJECT_ID}/${_IMAGE_REPO_ARTIFACT_NAME}/${_IMAGE_REPO_NAME}:${_IMAGE_TAG}
  - name: gcr.io/cloud-builders/docker
    #Puhsing image to Artifact Registry
    args:
    - push
    - ${_IMAGE_REPO_LOCATION}-docker.pkg.dev/${PROJECT_ID}/${_IMAGE_REPO_ARTIFACT_NAME}/${_IMAGE_REPO_NAME}:${_IMAGE_TAG}
substitutions:
    _IMAGE_REPO_NAME: 'ALLOW_LOOSE'
    _IMAGE_TAG: 'ALLOW_LOOSE'
    _IMAGE_REPO_ARTIFACT_NAME: 'ALLOW_LOOSE'
    _IMAGE_REPO_LOCATION: 'ALLOW_LOOSE'
options:
  logging: CLOUD_LOGGING_ONLY
Creating an Artifact Registry Repository
Artifact Registry is a private Docker registry that allows you to store and manage your Docker images. You'll need to create an Artifact Registry repository to store your images. Make sure to note down the region as you need to set this as one of the variables in the workflow.
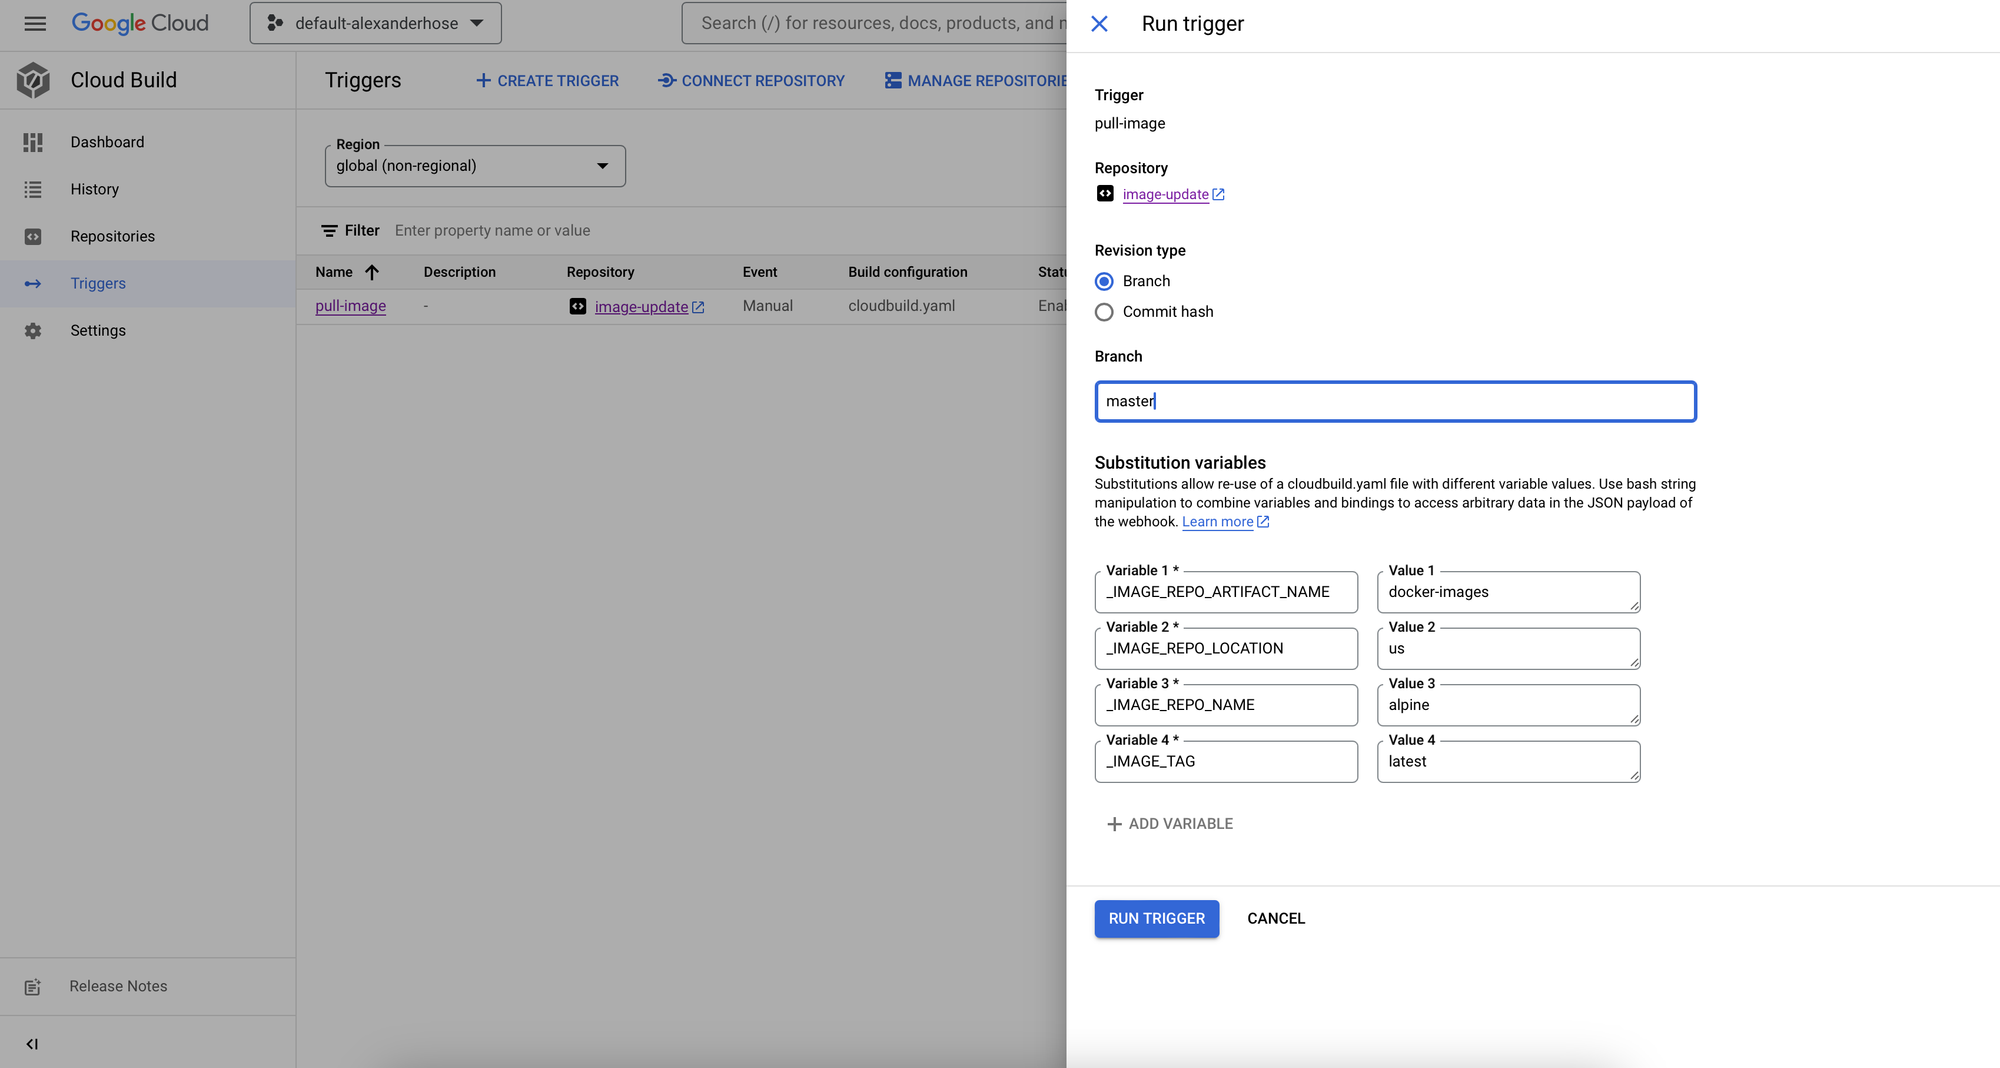
Run Your Workflow
Now that you have created your Cloud Build project and configured a trigger, you can run the build project to push your Docker image to Artifact Registry. Depending on the variables that you set, you can pull any image from Docker Hub.
Once you have executed the build, you can easily track its progress and outcomes by accessing the build history tab in the Cloud Build console.
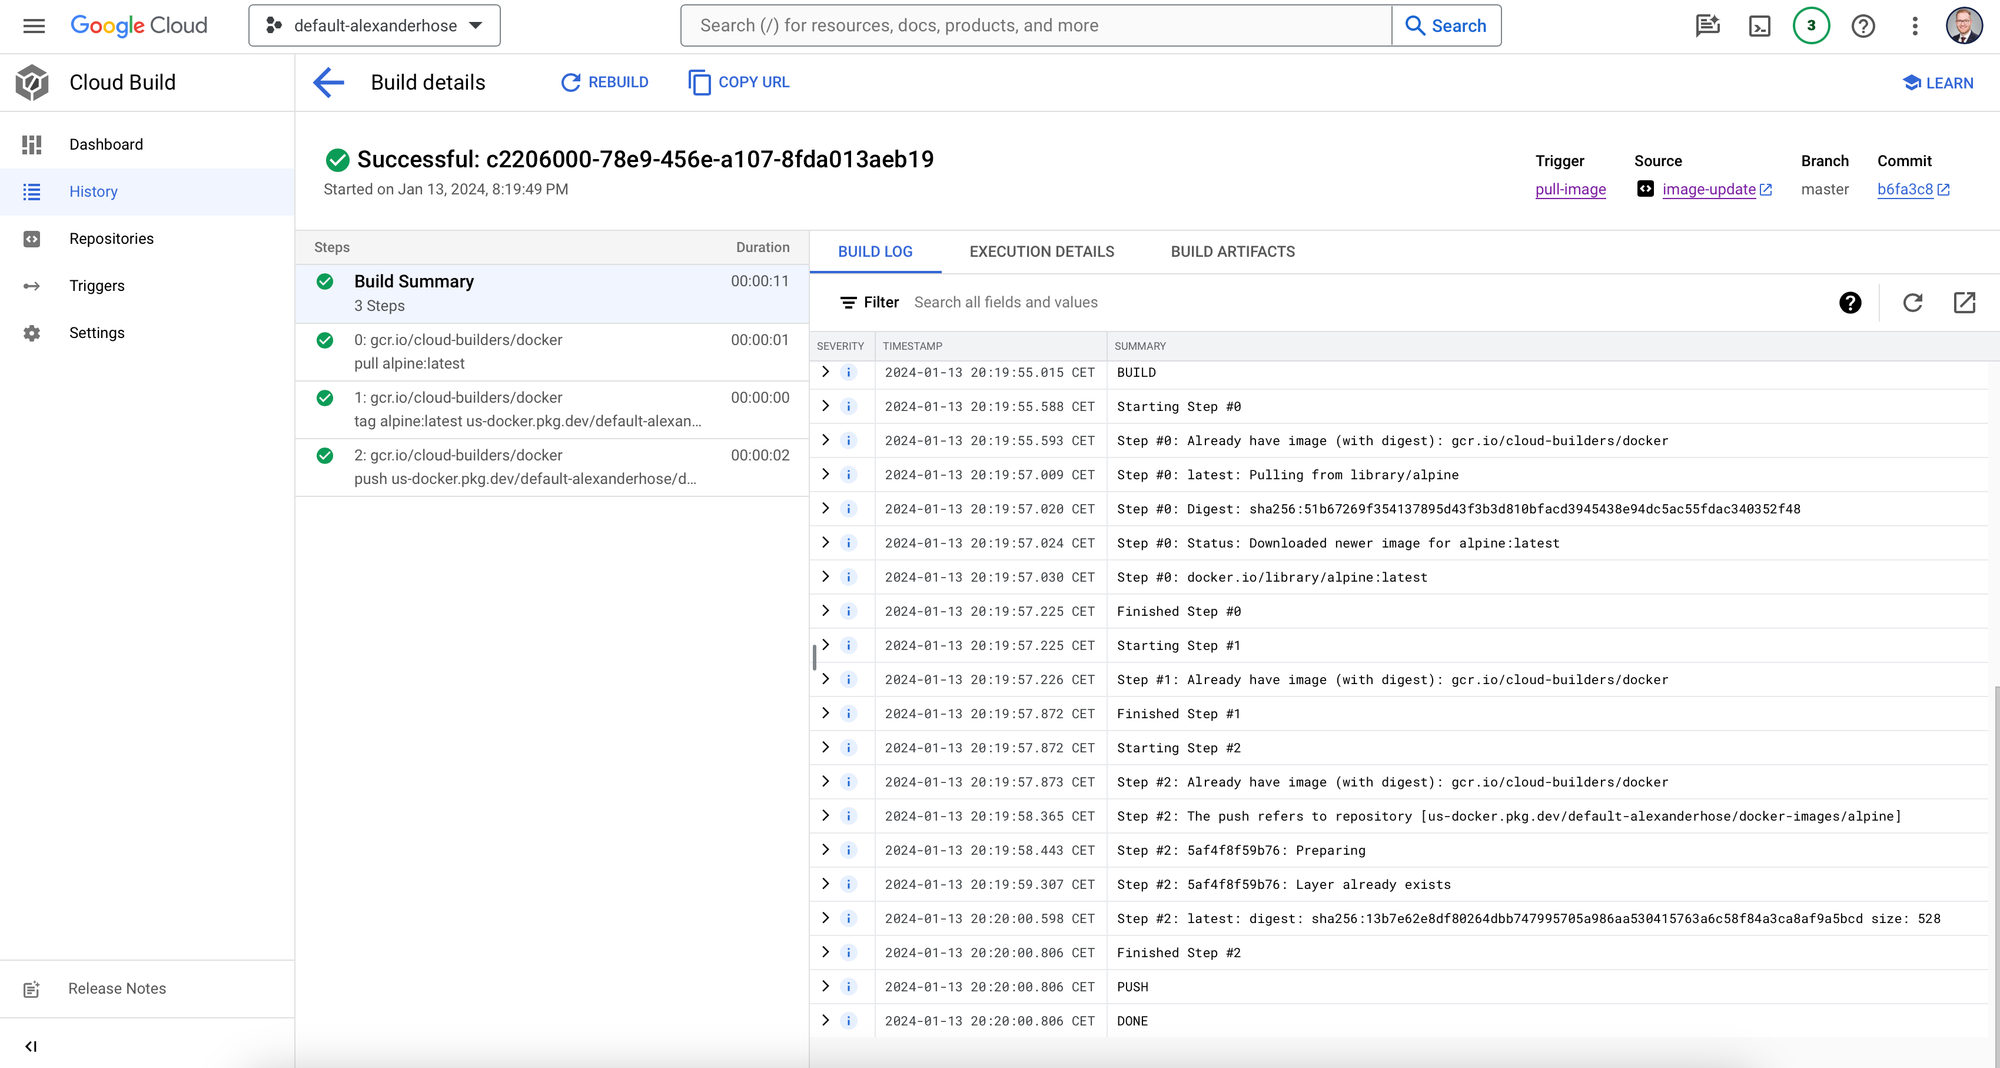
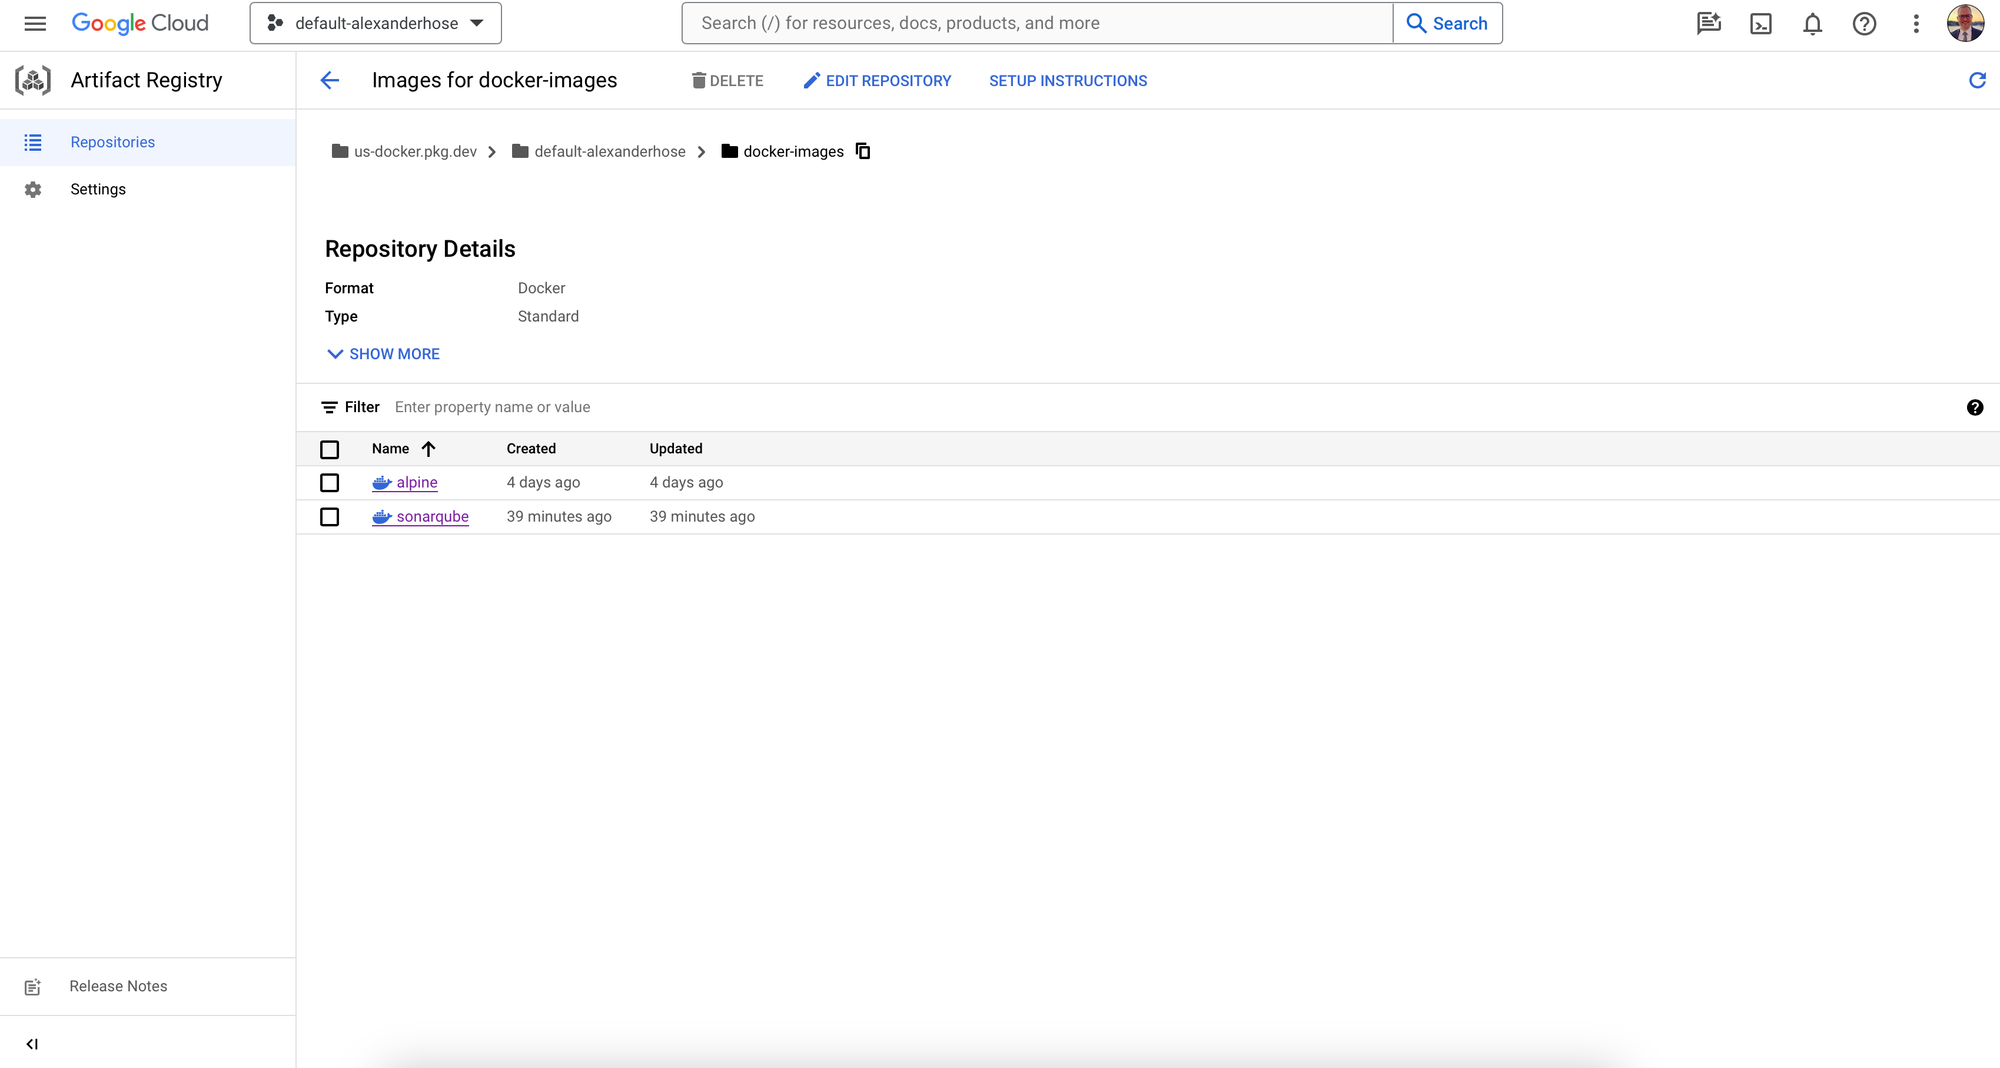
Once the build is complete, you can verify that your Docker image has been pushed to Artifact Registry by going to the Artifact Registry console and selecting your repository.
Conclusion 🎓
Cloud Build and Artifact Registry are powerful tools that can help you build, test, and deploy your software more efficiently. By using these tools together, you can streamline your CI/CD pipeline and ensure that your Docker images are always up-to-date and secure.


Member discussion