


Introduction
Let’s be honest: the current AI hype is exhausting.
Every company I talk to wants to “do something with AI.” Most don’t even know why - it just feels like something they should be doing. The result? Teams rush to train models on whatever data they can get their hands on, often without thinking about what’s actually inside those datasets.
I’ve seen it too many times: internal data lakes, storage buckets, BigQuery tables - all thrown into the AI blender without a second thought. Privacy? Compliance? Data classification? That’ll come later - maybe.
This is exactly why GCP Sensitive Data Protection exists. It helps you identify sensitive information - like PII, secrets, or payment data across key services like:
- Cloud Storage
- BigQuery
- Cloud SQL
- Secrets Manager
- Vertex AI Datasets
And the best part? You can integrate findings directly into Google Security Command Center (SCC), Pub/Sub, BigQuery, automatically assigning them to the right teams for remediation. It’s a scalable way to bring data governance and privacy back into the AI development loop.
How to Configure Sensitive Data Discovery in Google Cloud
Setting up GCP Sensitive Data Protection isn’t complicated, but doing it right ensures that you’re actually catching sensitive data. Here’s how to configure discovery from the ground up.
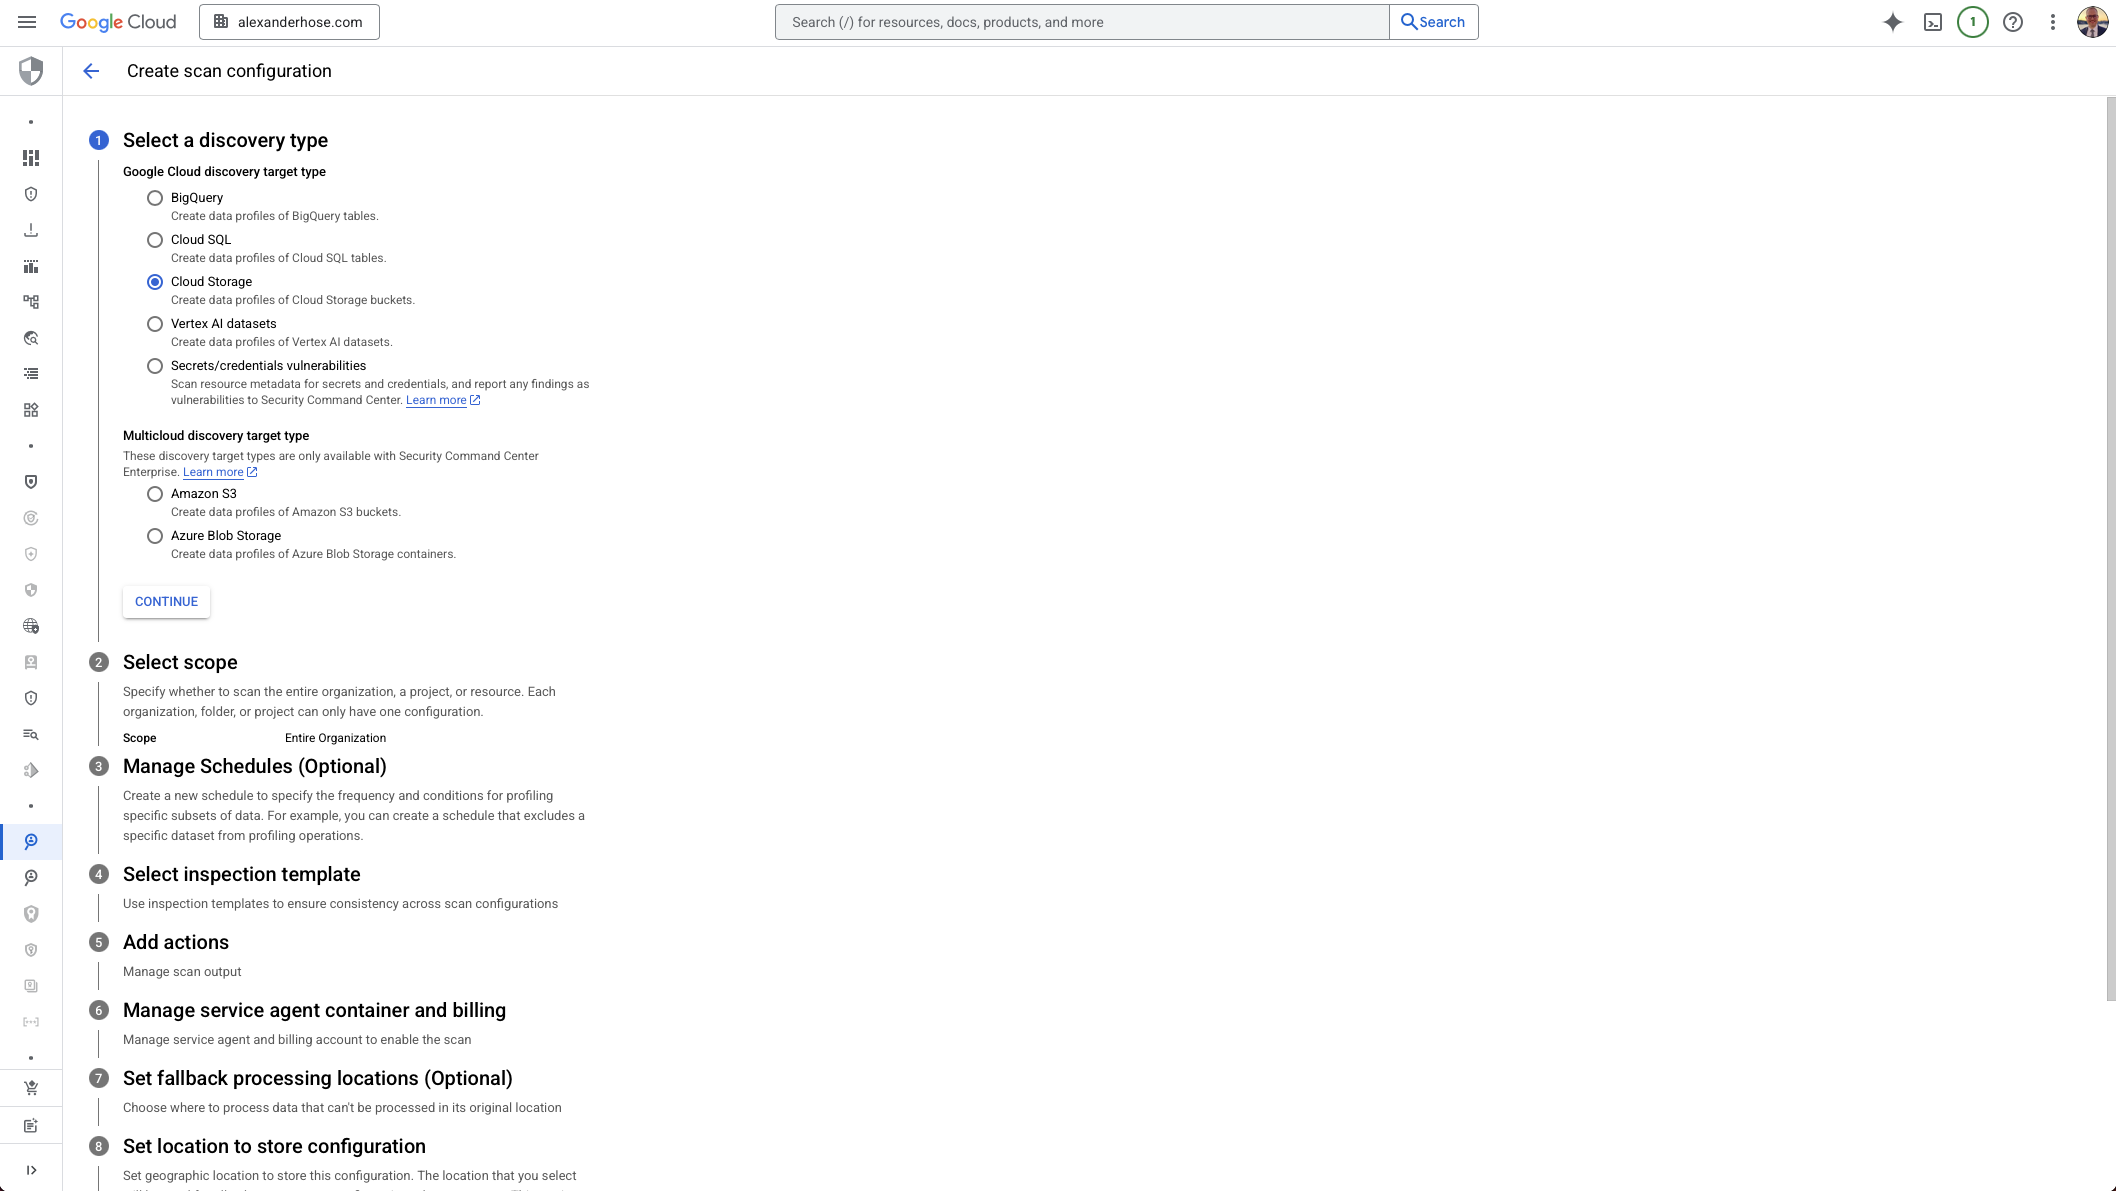
1. Choose What to Scan: Set the Discovery Target Type
Start by selecting the discovery target type. This defines the kind of resources you want to scan - for example, Cloud Storage, BigQuery, or Cloud SQL. GCP offers support for a growing number of services, so make sure you choose the relevant ones for your environment.
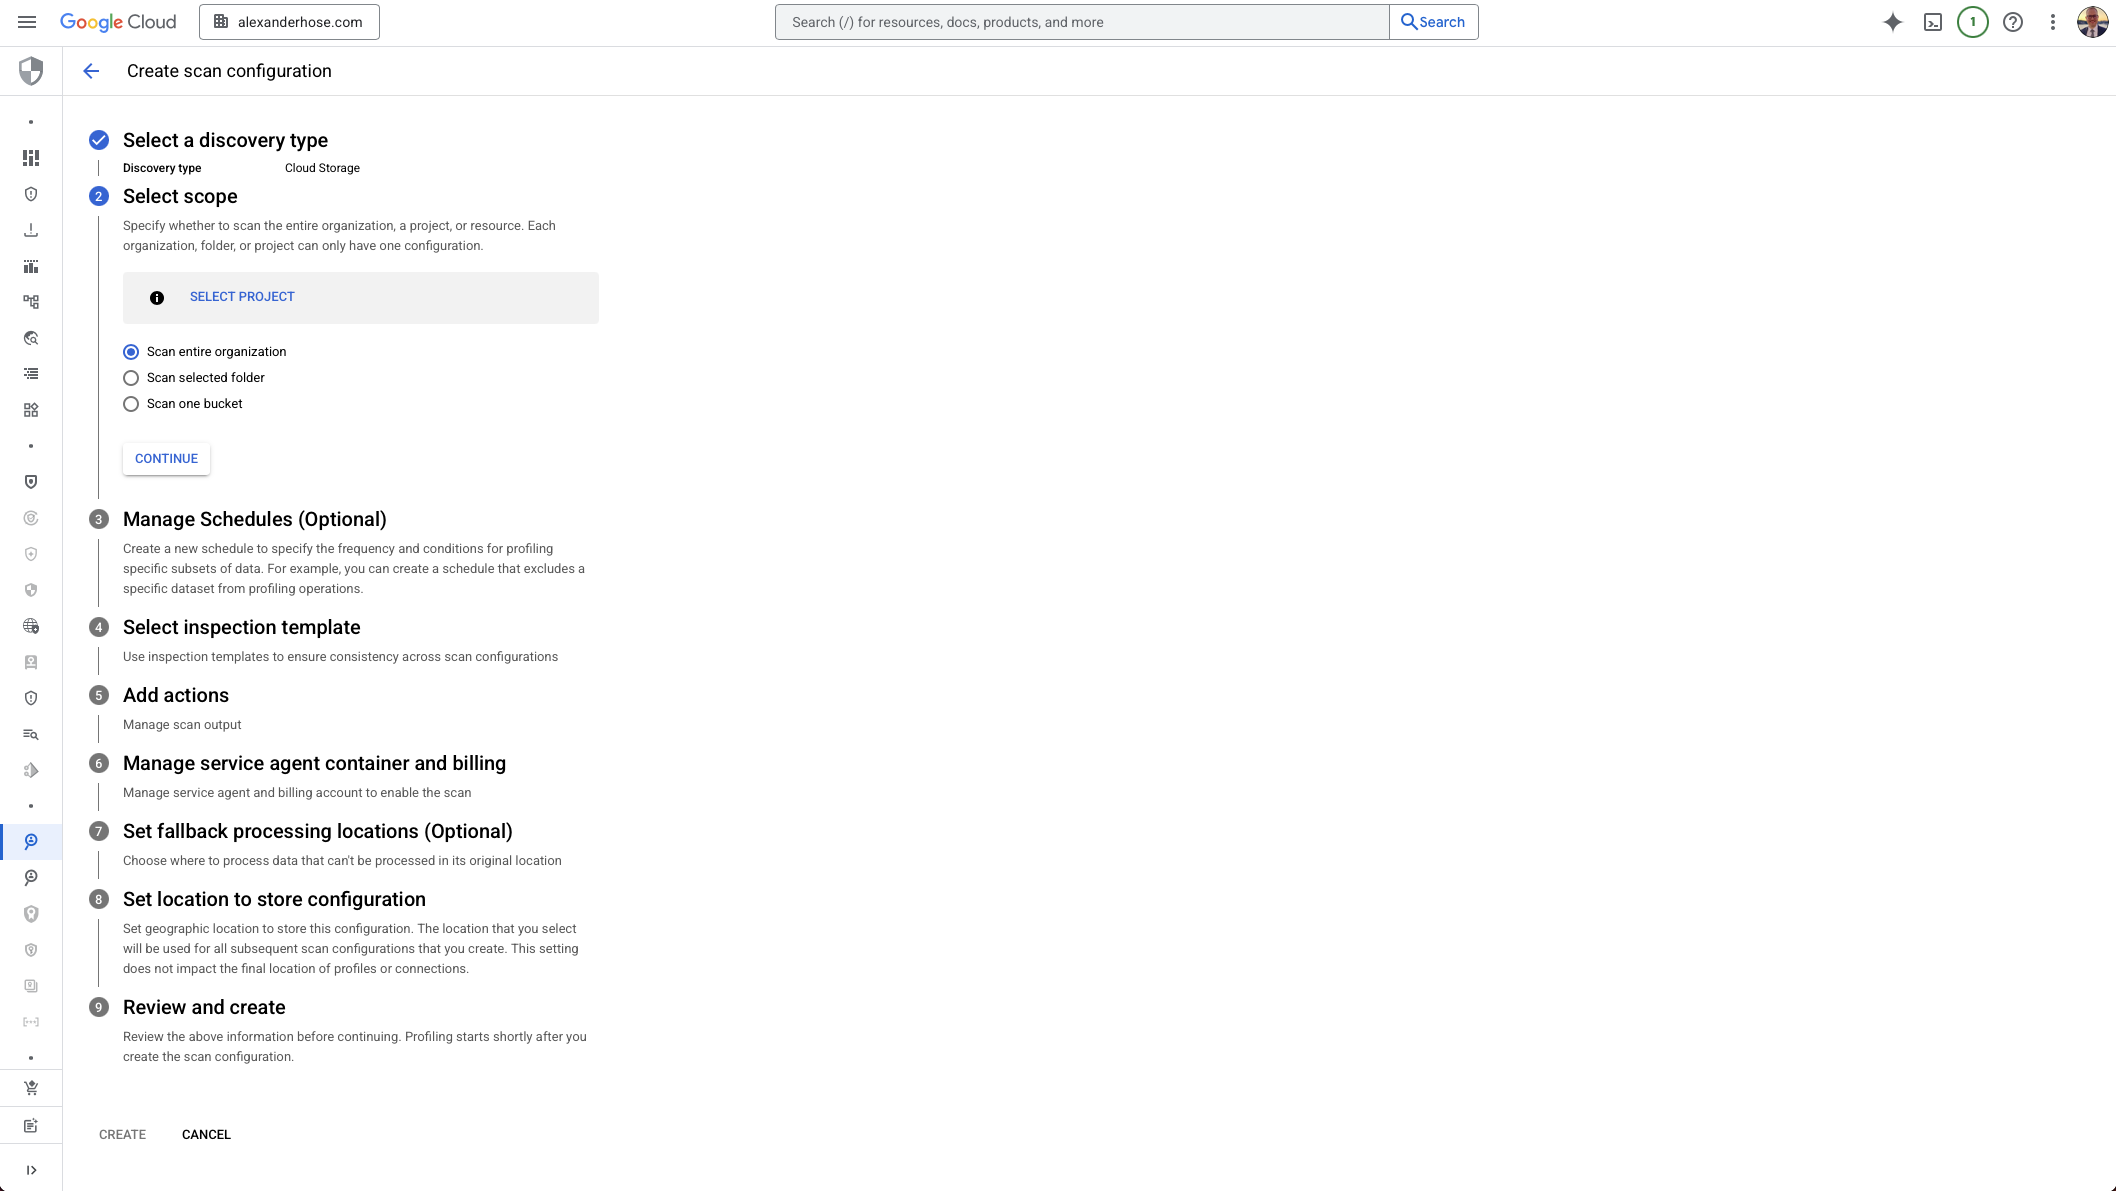
2. Define the Scope: Organization, Folder, or Project
Next, choose whether to scan your entire organization, a specific folder, or just a project. This is an important decision - you can only have one configuration per organization, folder, or project. Keep in mind that centralizing this at the org level often makes the most sense for governance.
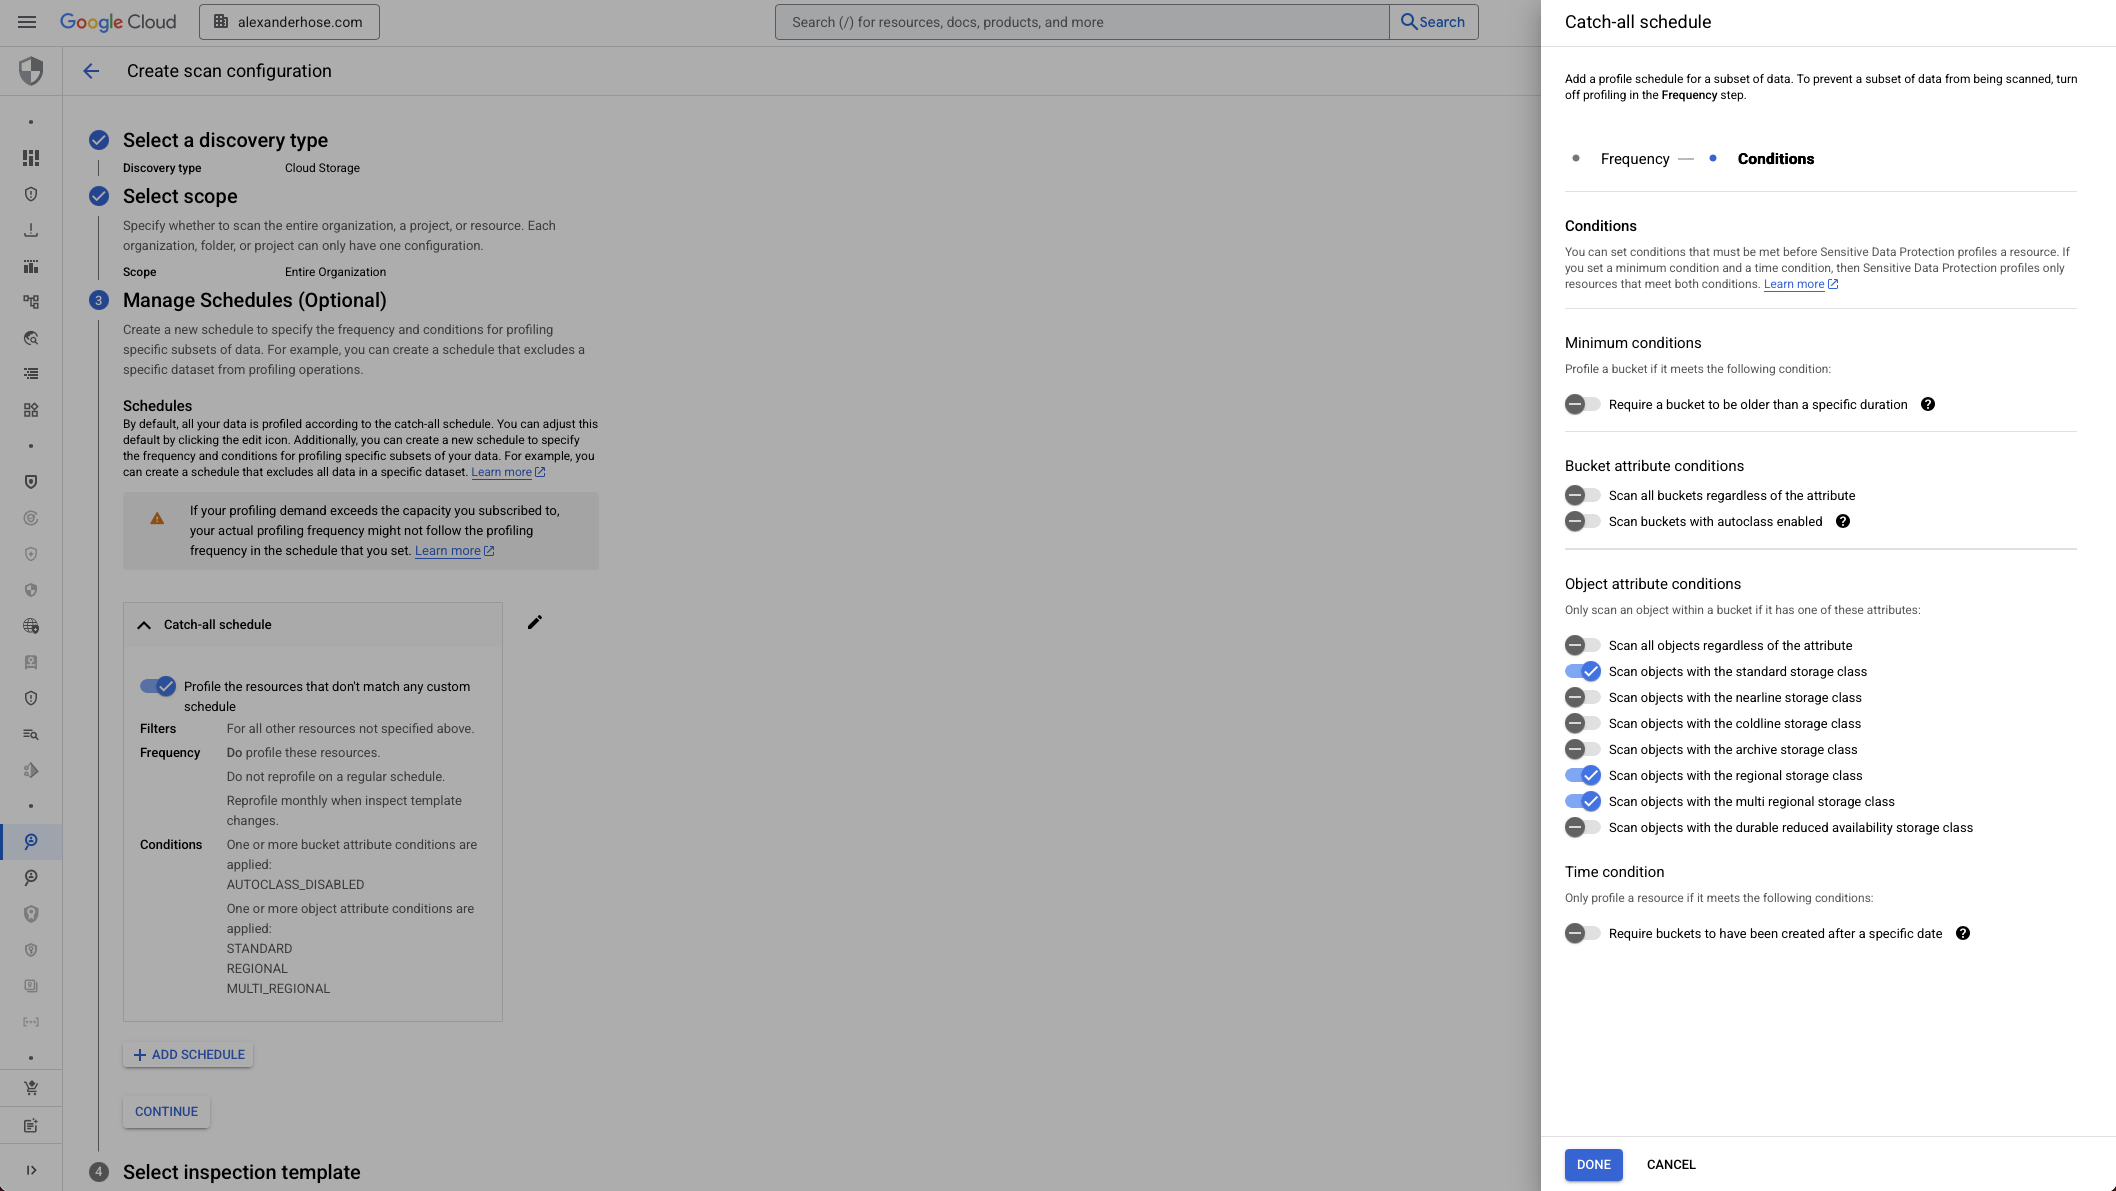
3. Control When and What to Profile: Create a Discovery Schedule
This step lets you fine-tune when profiling happens and what data gets scanned.
- Use filters to include or exclude datasets or resources.
- Set minimum conditions to delay profiling until a table has enough rows or is old enough.
- Add a time condition to skip outdated tables entirely - useful for avoiding noisy or irrelevant results.
This gives you the flexibility to profile only what really matters, reducing cost and improving scan quality.
4. Select Relevant InfoTypes to Scan For
You don’t need to scan everything. Focus on InfoTypes that are relevant to your business - like credit card numbers, national IDs, or custom identifiers. This reduces noise and helps you avoid false positives.
If you're feeding these results into automated workflows, staying targeted here is critical.

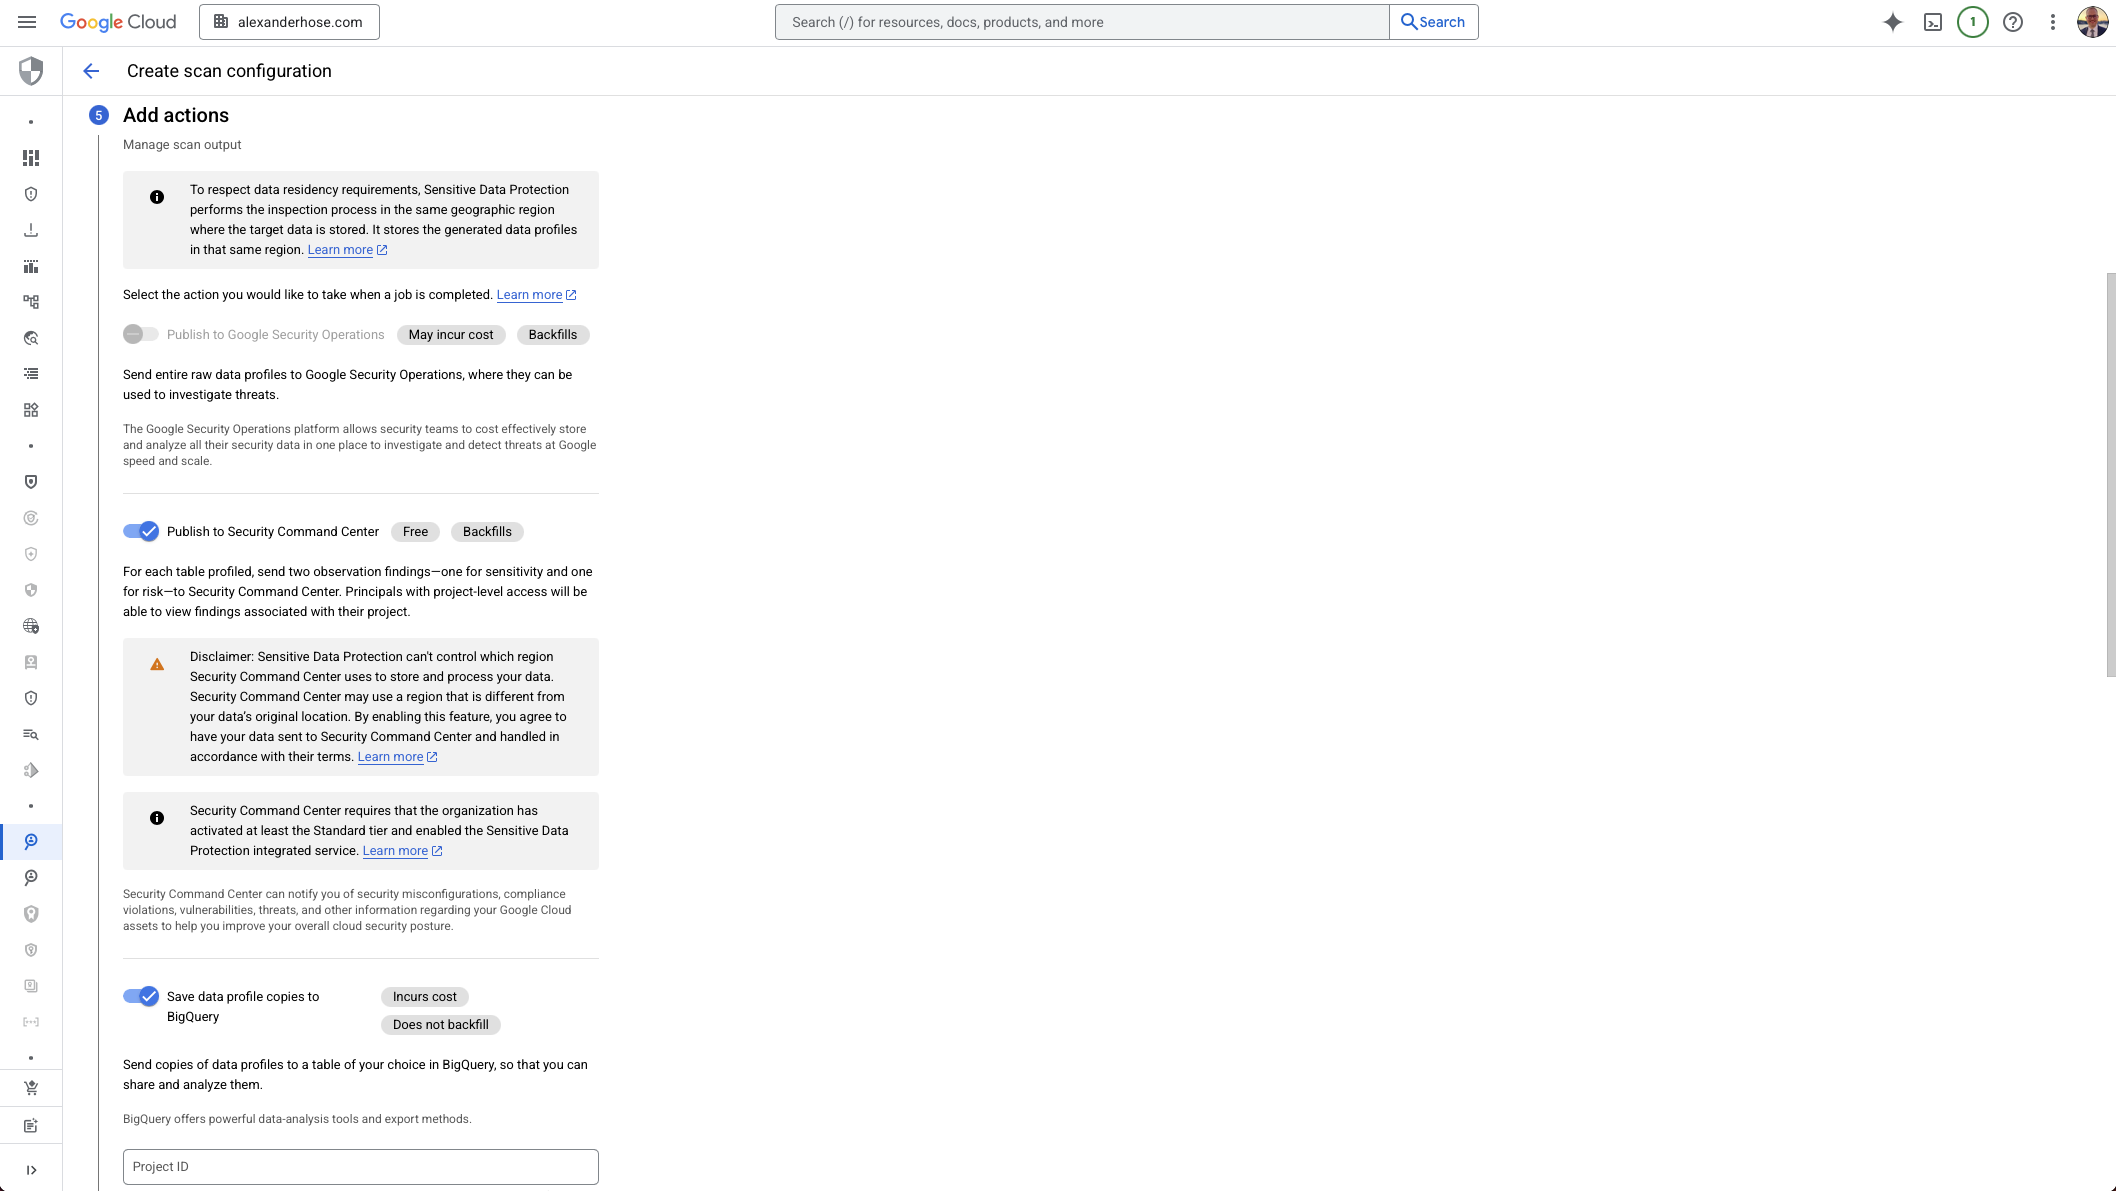
5. Choose Where to Send the Scan Results
By default, Sensitive Data Protection findings can be integrated with Security Command Center (SCC) - and this is usually the best path. It centralizes your findings, supports auto-assignment, and gives your security teams one place to work from.
You can also send findings to Pub/Sub, but this often leads to fragmentation.
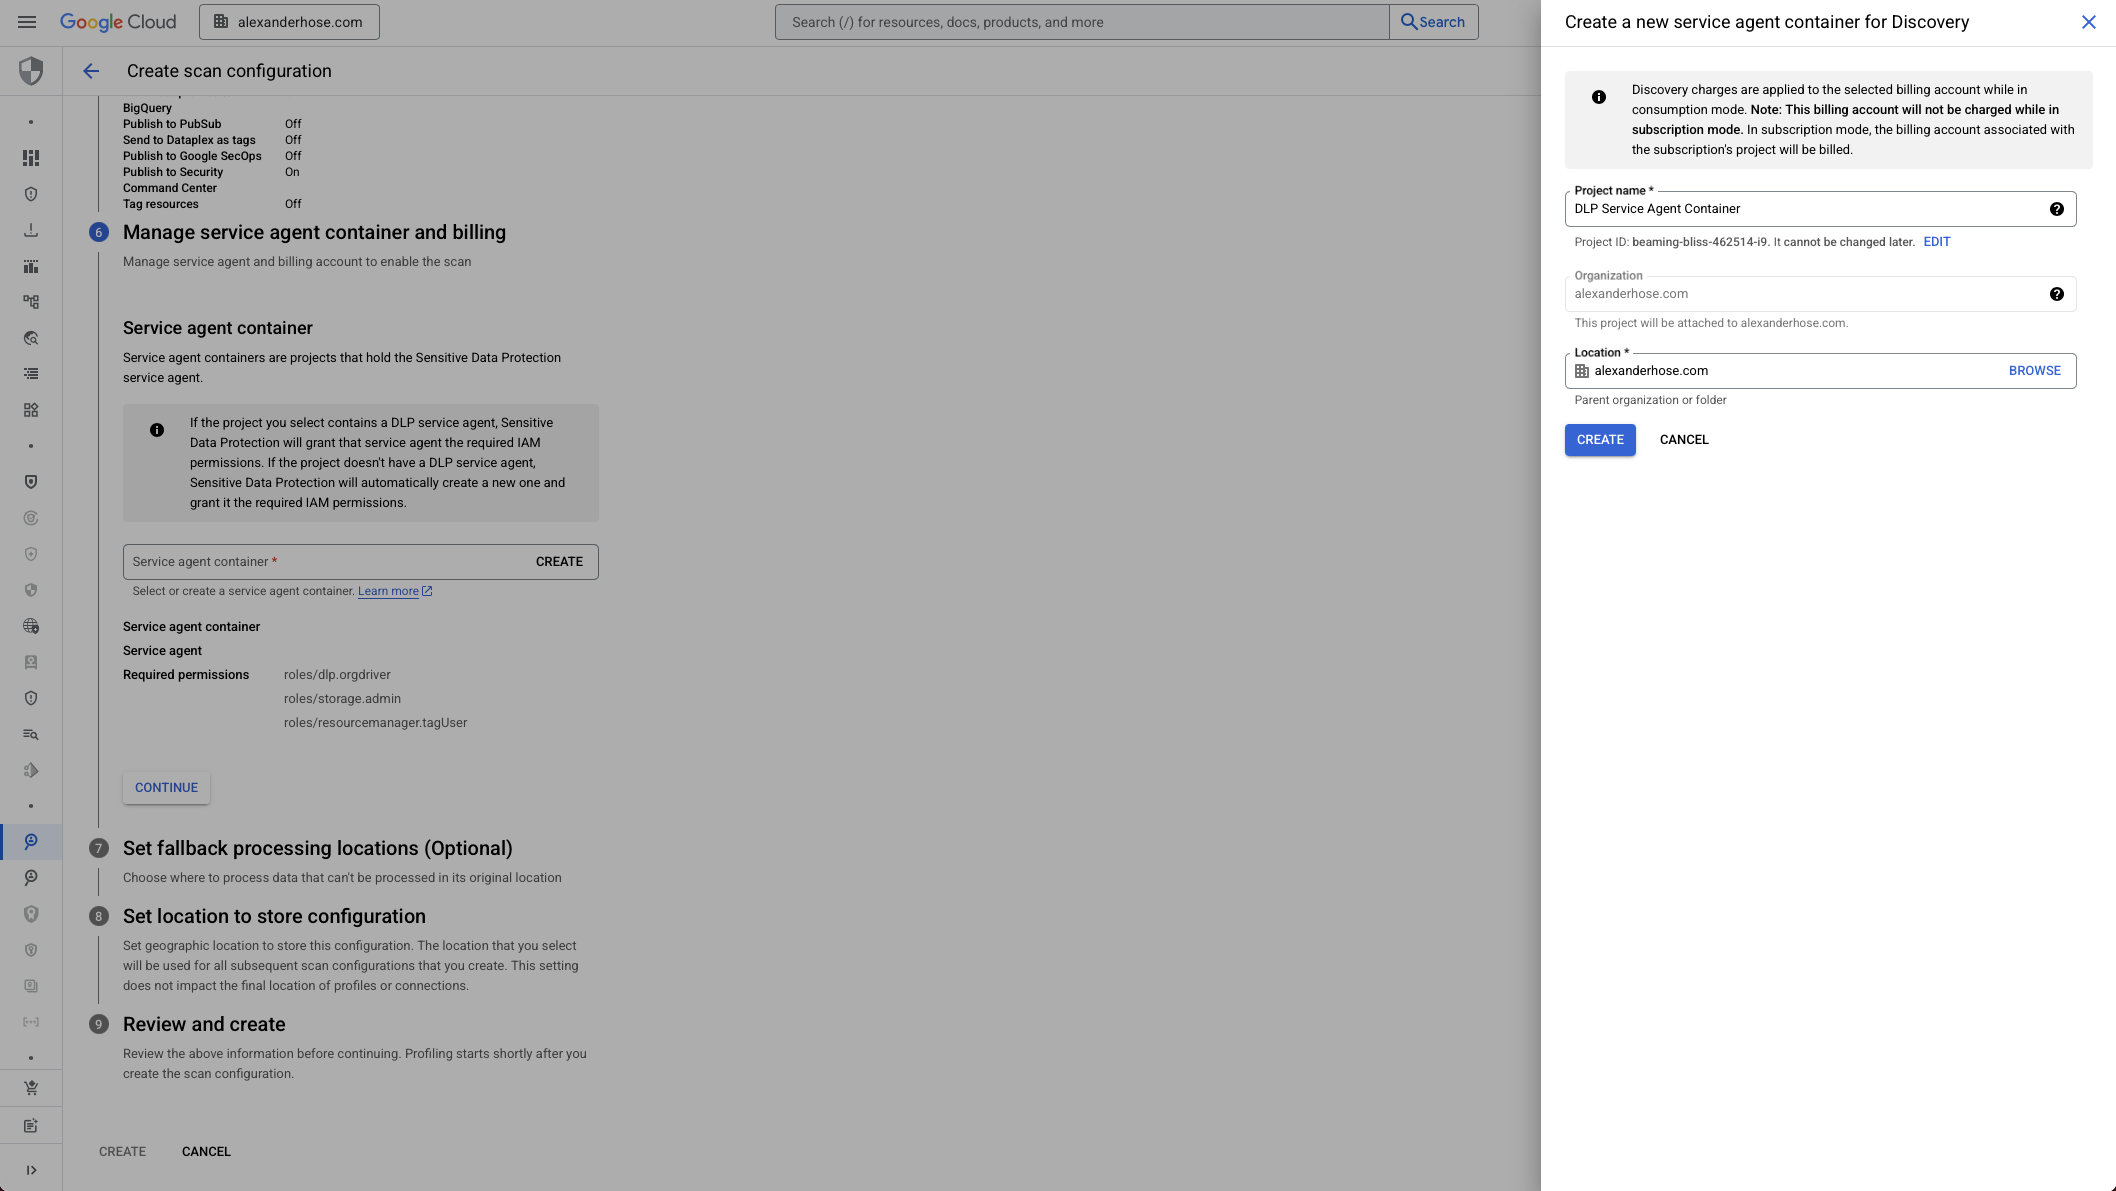
6. Create or Reuse a Service Agent Container
Each discovery configuration needs a service agent container project, which provides the necessary identity and permissions.
You can either:
- Create a new project for this.
- Or reuse an existing one.
Make sure the DLP API service agent has these roles:
roles/dlp.orgDriverroles/storage.adminroles/resourcemanager.tagUser
Without these, discovery jobs will fail.
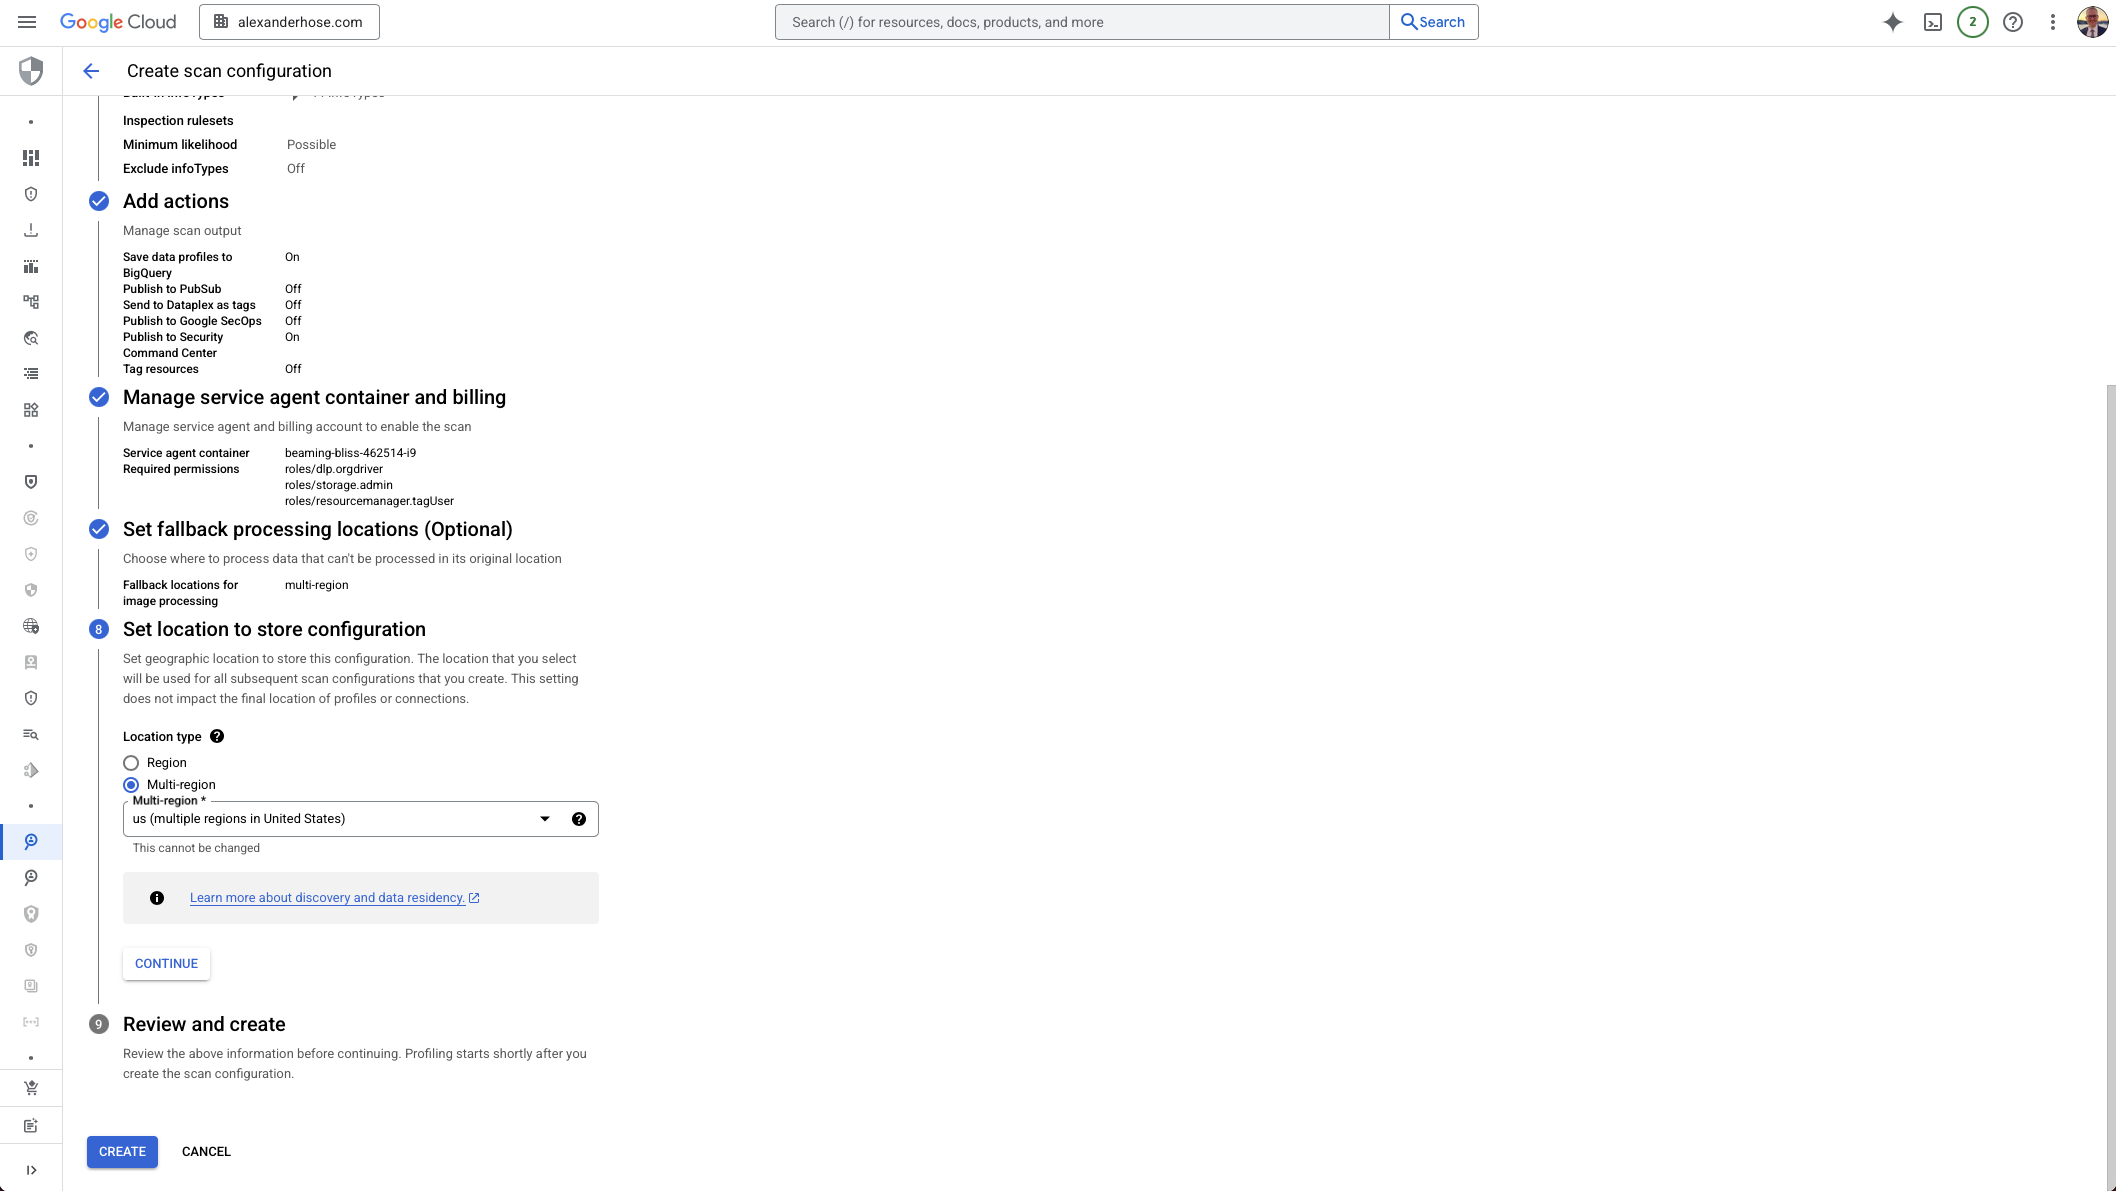
7. Configure Fallback Processing Locations (Optional)
By default, Sensitive Data Protection processes data in the same region where it’s stored. But not every feature is available in all regions. If needed, set a fallback location to ensure scans still work when regional support is limited.

8. Set the Configuration Storage Location
Finally, define where the discovery configuration itself will be stored. This setting does not impact where data is profiled - it only determines the region for the configuration metadata.
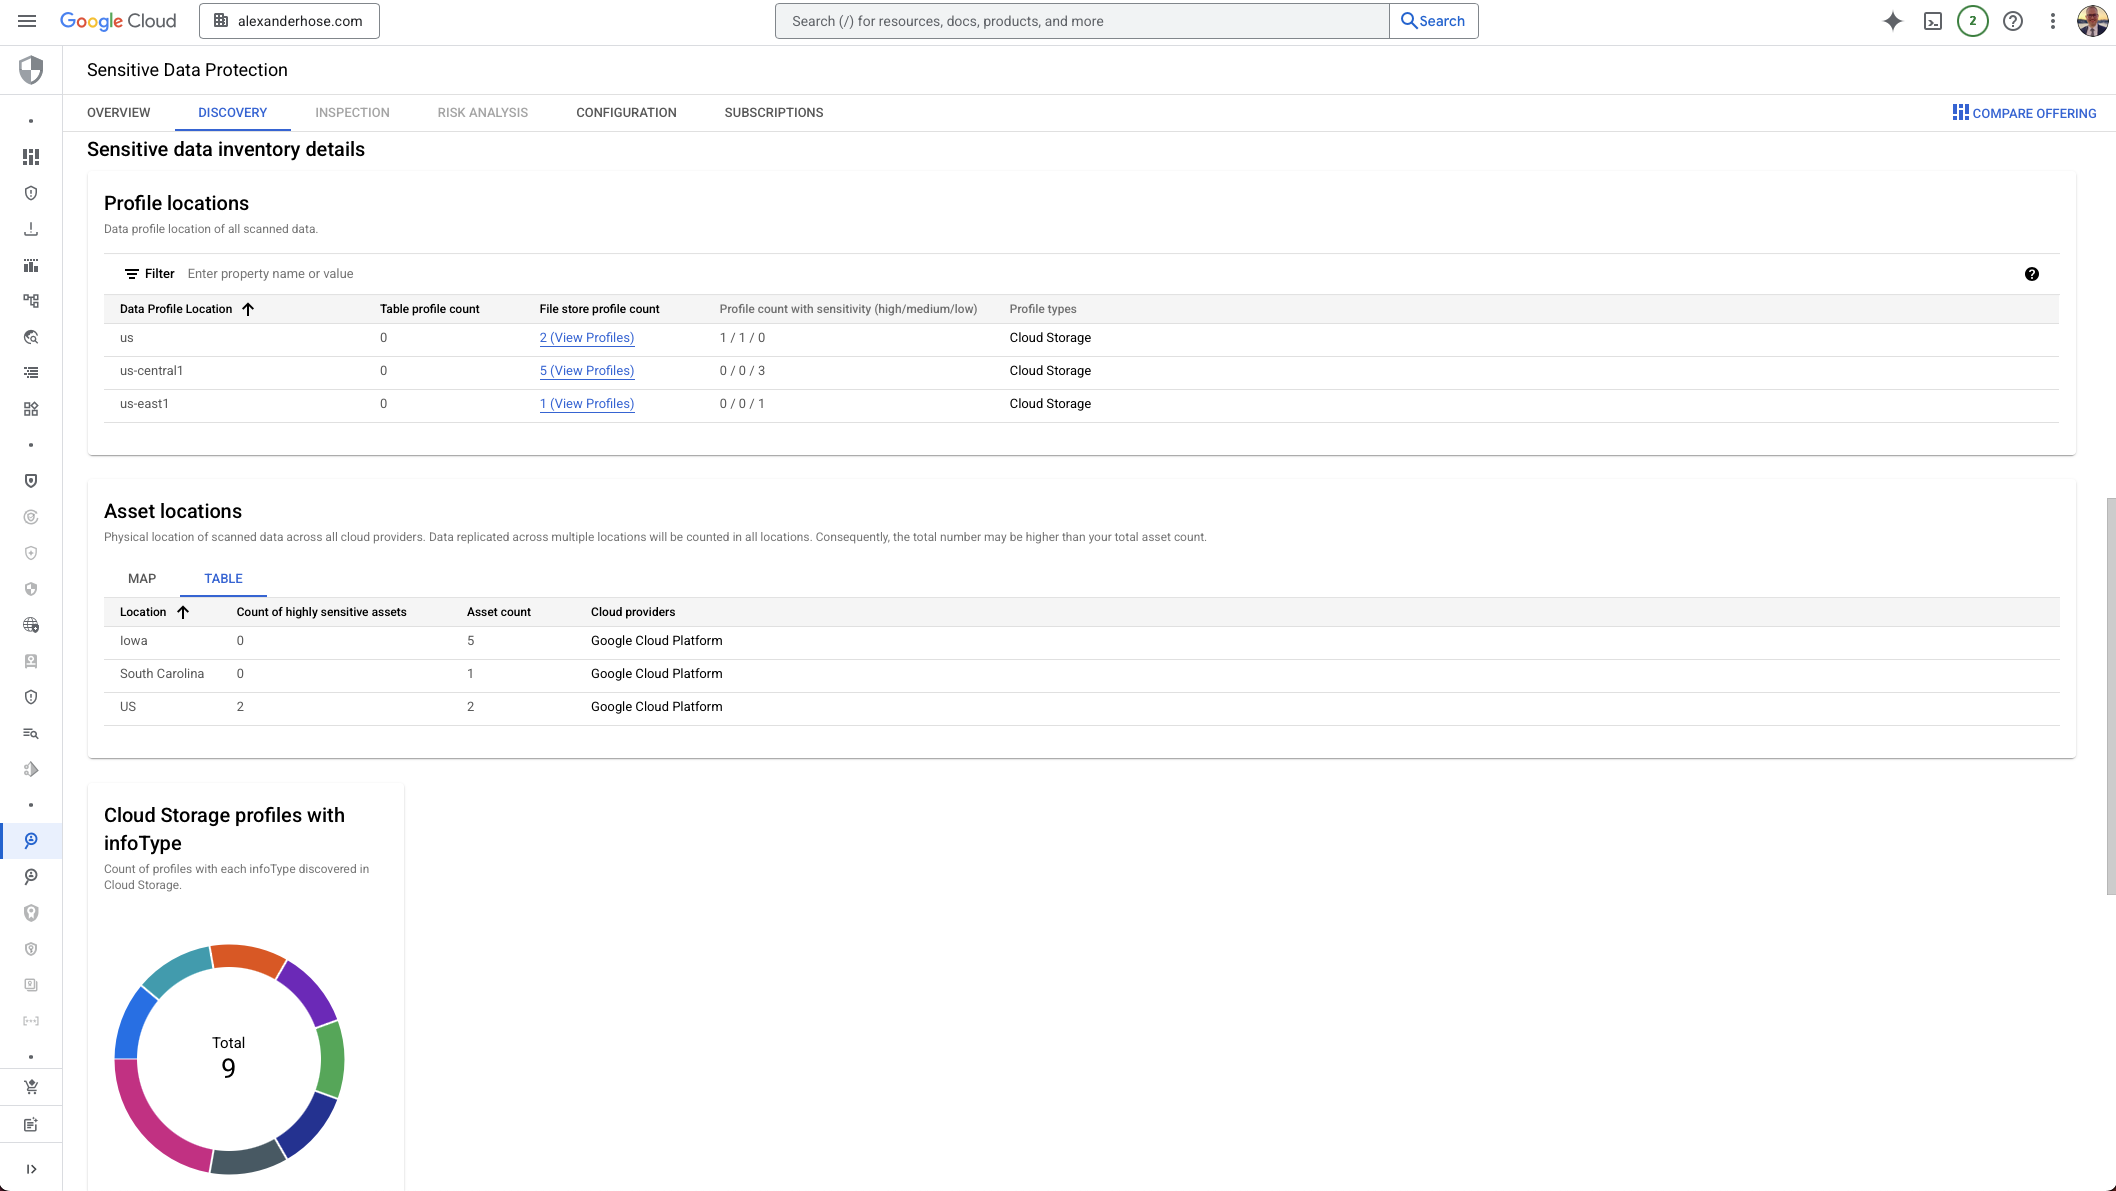
What Happens Next: Viewing Your Sensitive Data Discovery Results
After the configuration is in place and your discovery schedules are running, you might need to wait a bit - sometimes even hours - before you see any results. But once the scans complete, GCP gives you a nice aggregated view of where sensitive data lives across your environment.
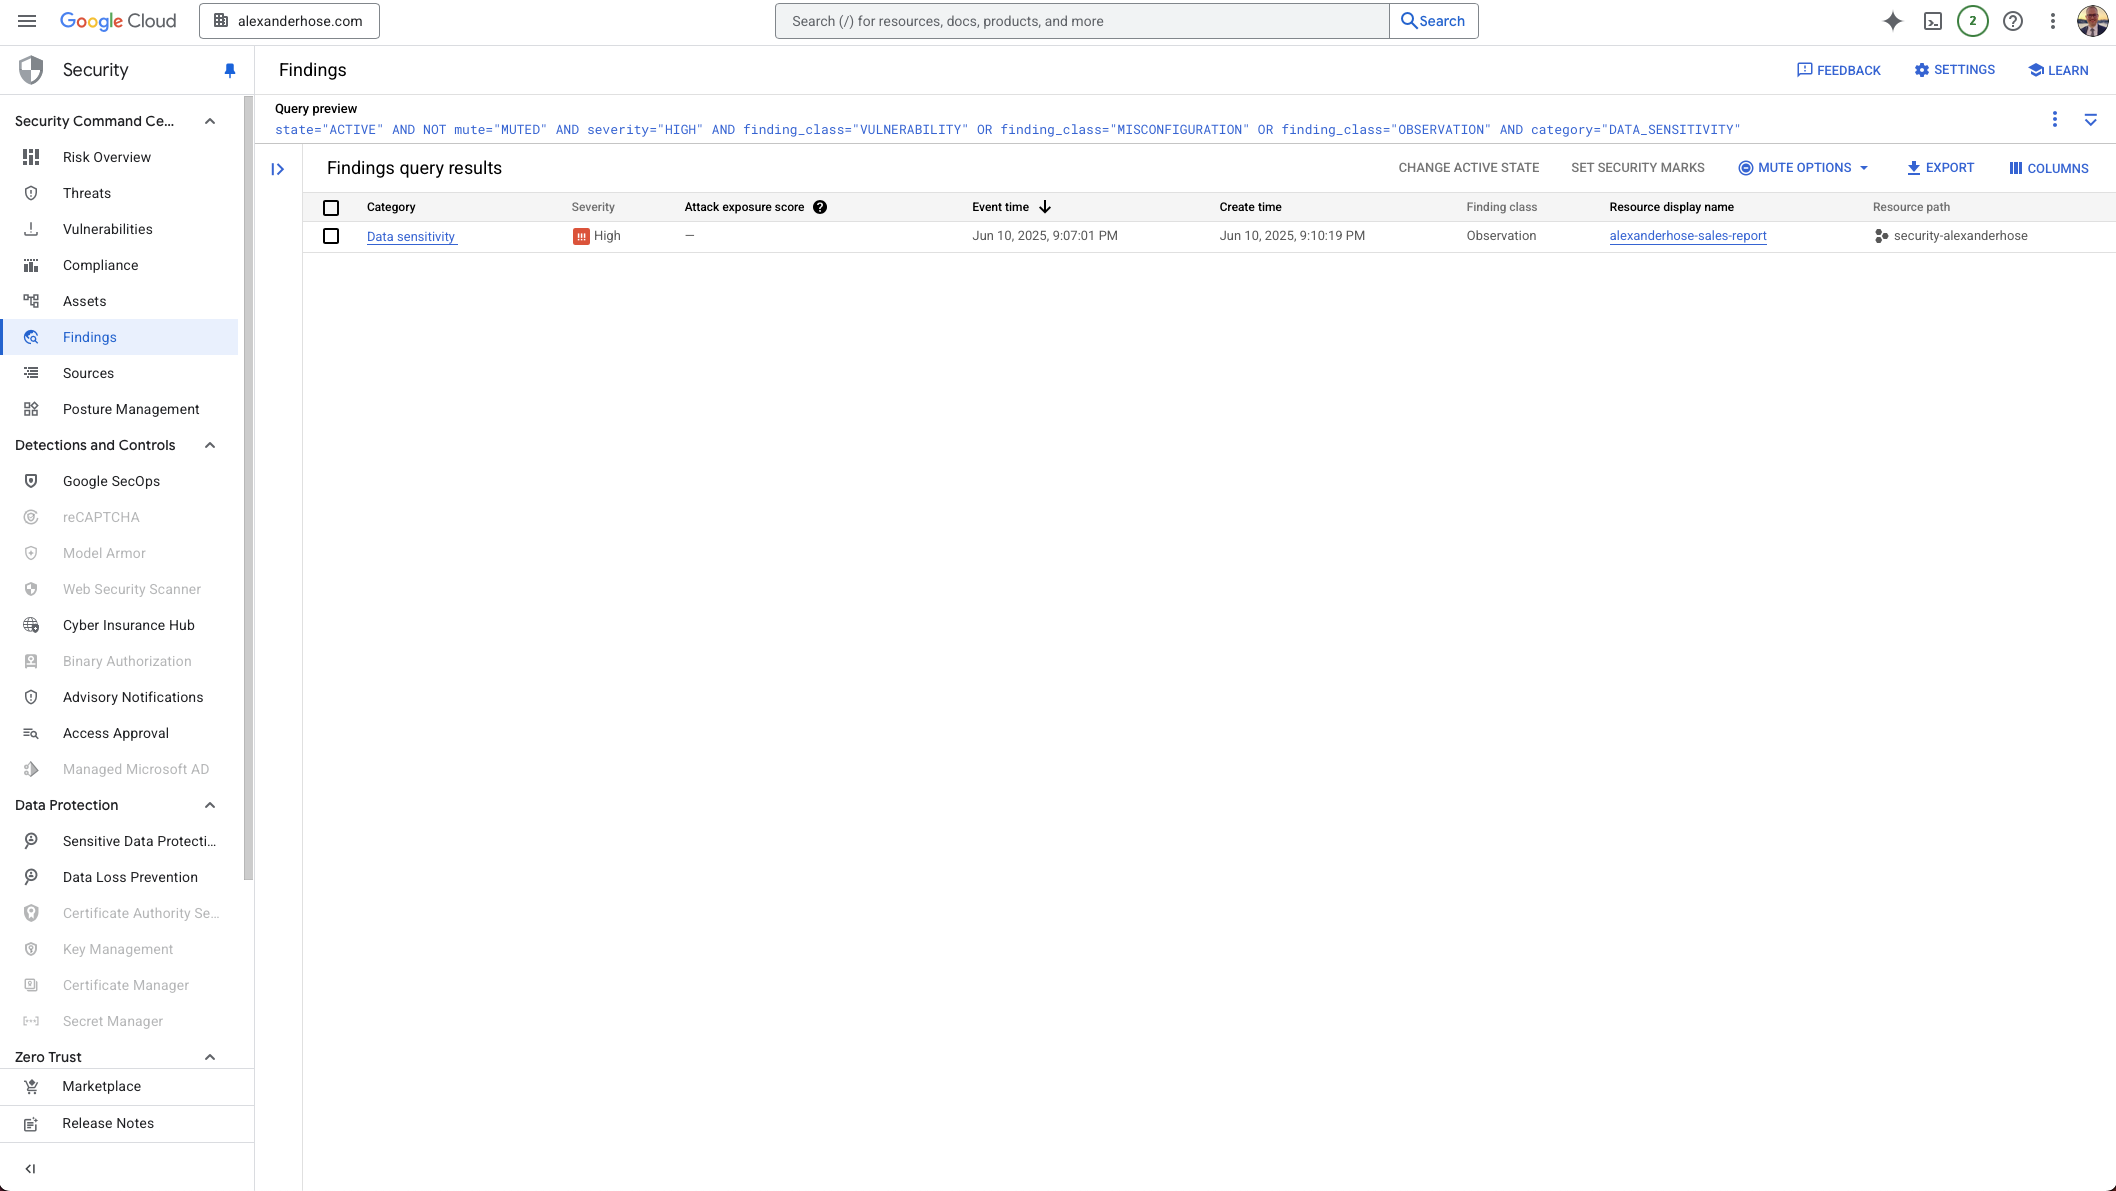
Your findings also automatically propagate to Security Command Center (SCC) if configured. It’s incredibly useful, especially if you integrate this with automation - for example, assigning findings to the correct team based on project or label.
You’ll also see that your service agent container project now shows data in BigQuery. Here's a simple query example that lets you summarize sensitive data findings per project:
SELECT
  file_store_profile.project_id AS project_id,
  COUNT(*) AS data_source_count
FROM
  sensitive_data_protection_discovery.discovery_profiles_latest_v1*
GROUP BY
  project_id
ORDER BY
  data_source_count DESC
This is just the beginning. Once you know where sensitive data lives, you can start asking the more important question: “Should it be there in the first place?” And that’s exactly where security context, governance, and yes - sometimes even automation with Cloud Run Functions - can take over.
Common Pitfall: DLP API Not Enabled or Project Not Fully Ready
One issue I’ve seen more than once: you configure everything correctly, hit "create," and then get this error:
“Failed to enable the DLP API service. Please try enabling manually here: https://console.cloud.google.com/apis/library/dlp.googleapis.com?project=YOUR_PROJECT_ID”
There are usually two root causes:
- The DLP API isn’t enabled yet.
You’ll need to manually enable it for your container project. - The project hasn’t fully initialized.
Even if you just created the container project, it may take a few minutes before it’s ready for DLP to hook into it. In that case:- Wait a few minutes
- Manually verify billing is enabled
- And yes… you might need to restart the configuration process from step one.
It’s frustrating, but once it’s set up, it runs very reliably.


Member discussion